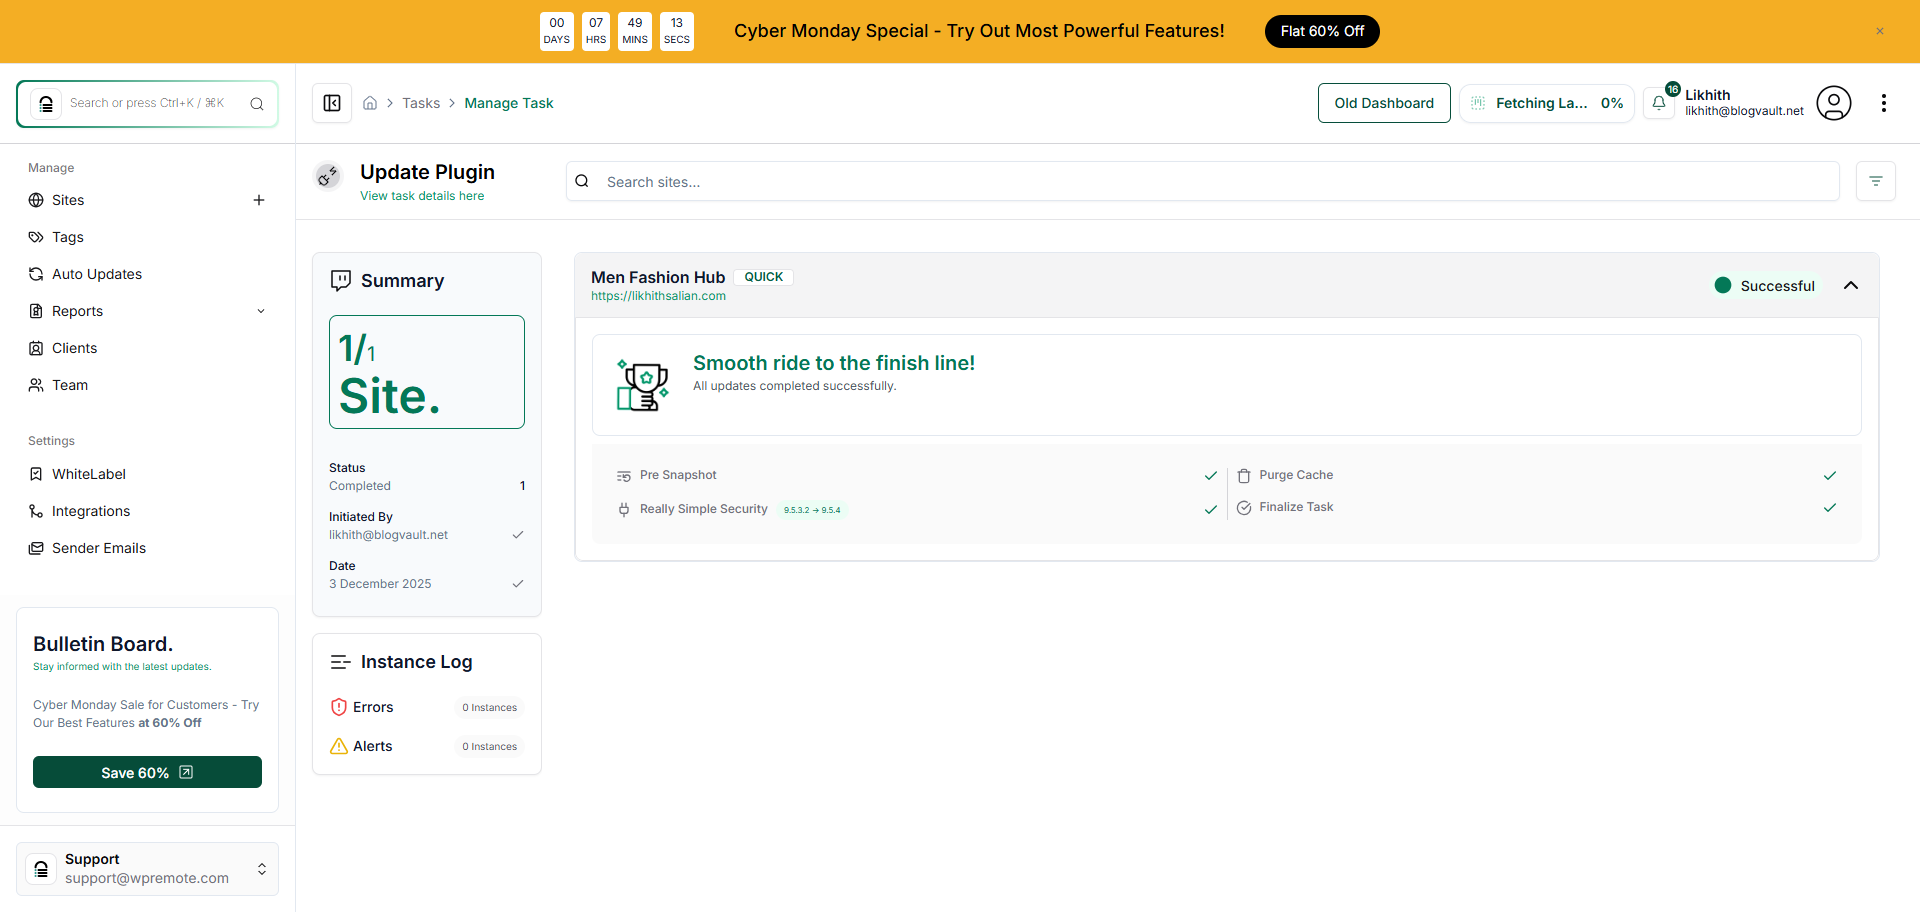
How Can I Perform a Sandbox Update?
Step 1 of 12
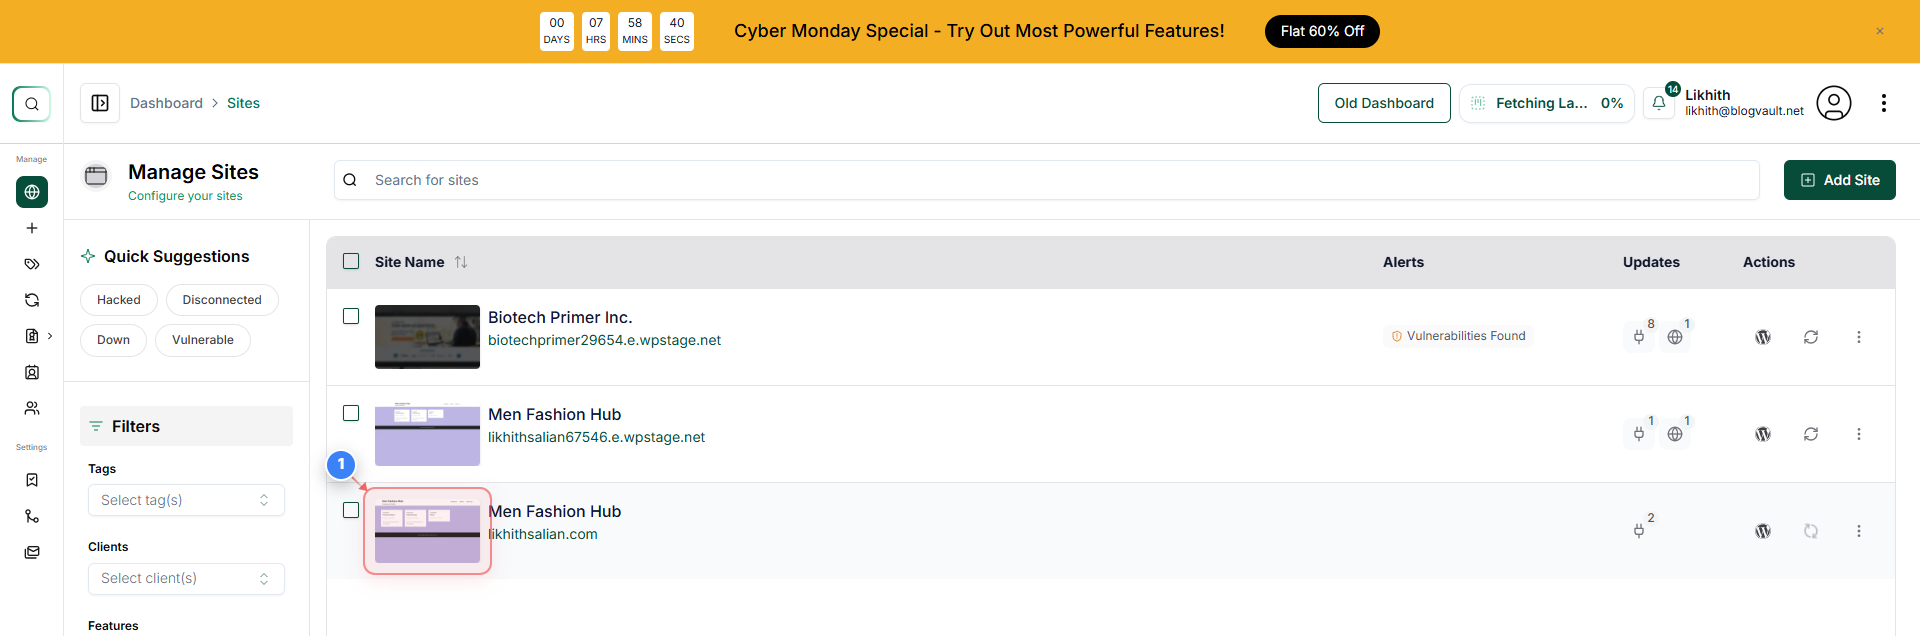
Select Your Site
Click n your site site to open its management dashboard.
Note: This action initiates the management workflow for the chosen WordPress installation.
Step 2 of 12
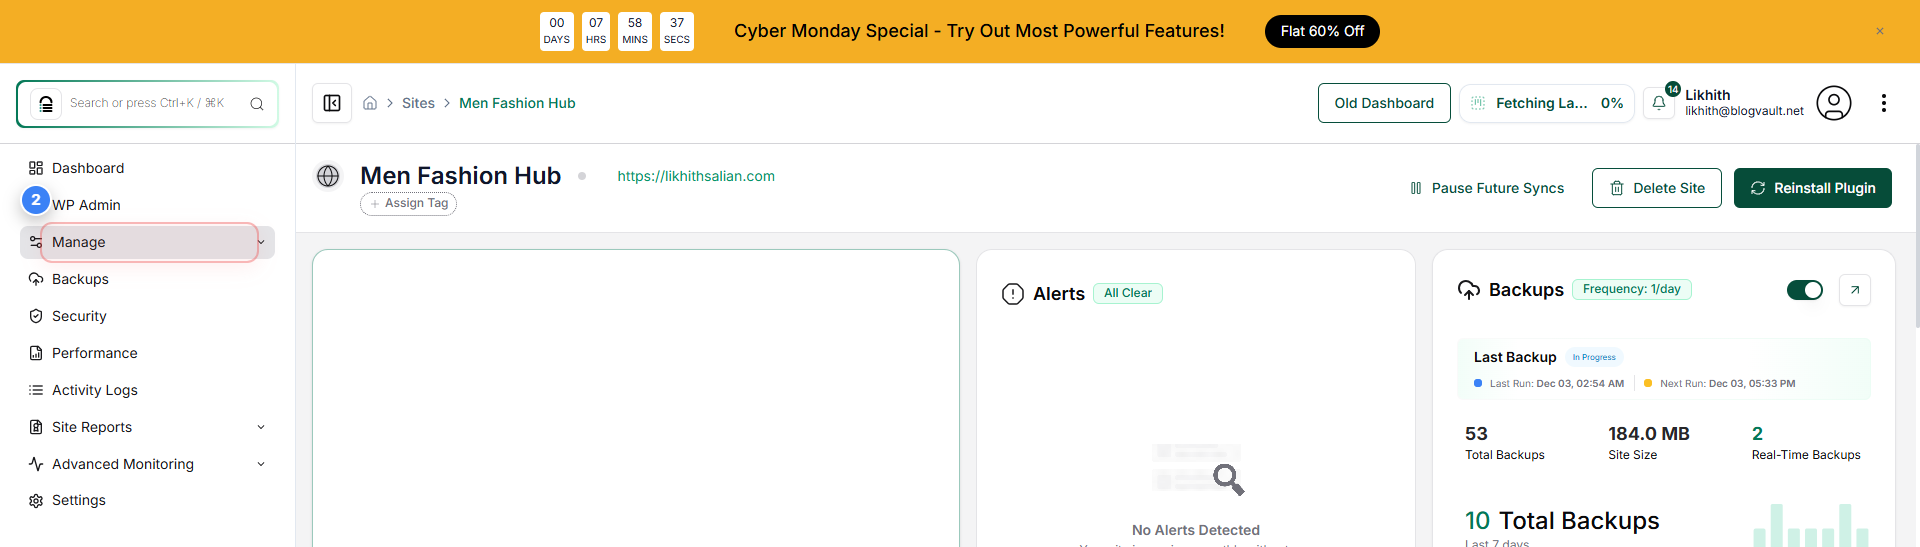
Open the Management Panel
Click **Manage** from the left sidebar to access site management options.
Note: This expands the menu necessary to access site configuration sections.
Step 3 of 12
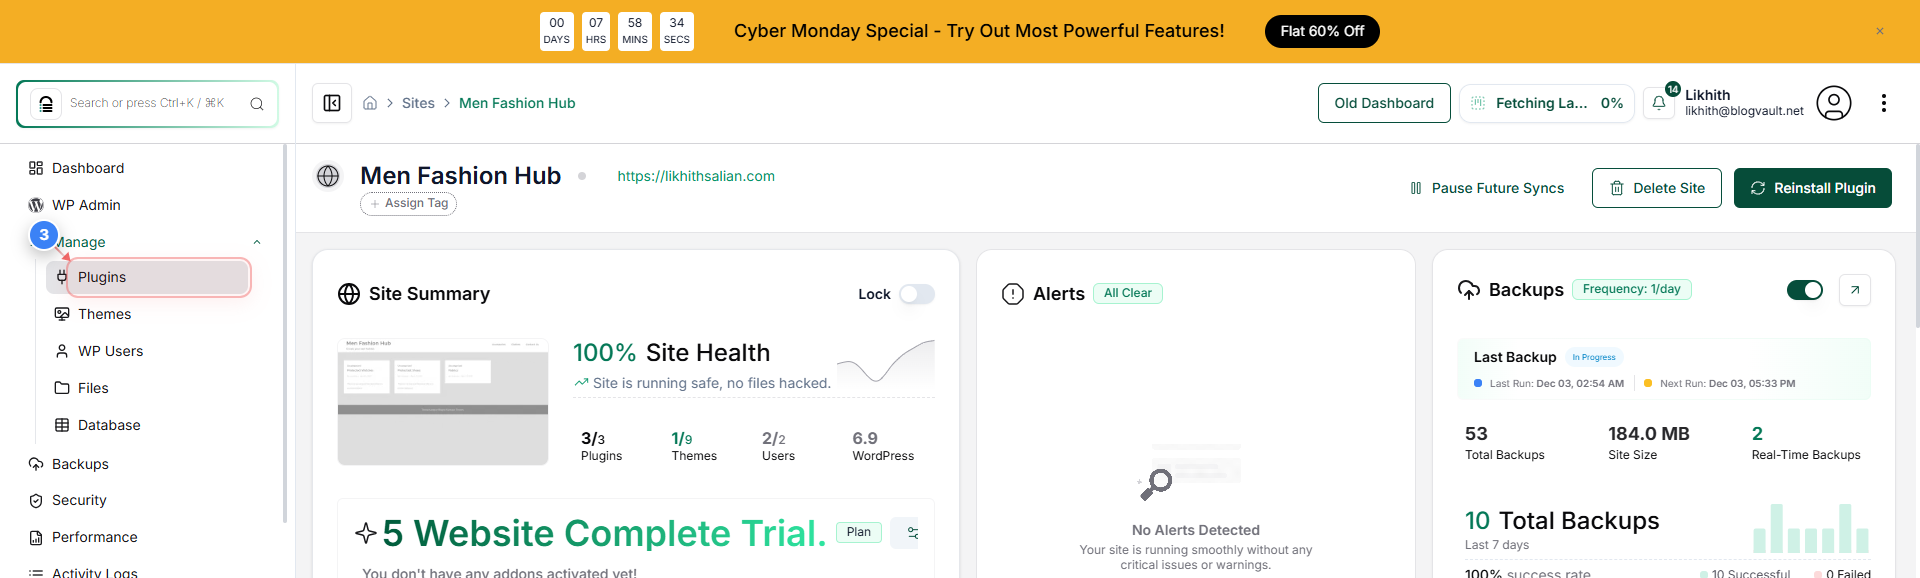
Navigate to Plugins
Select **Plugins** from the Manage submenu to view installed plugins.
Note: This page allows you to activate, deactivate, update, or manage individual plugins.
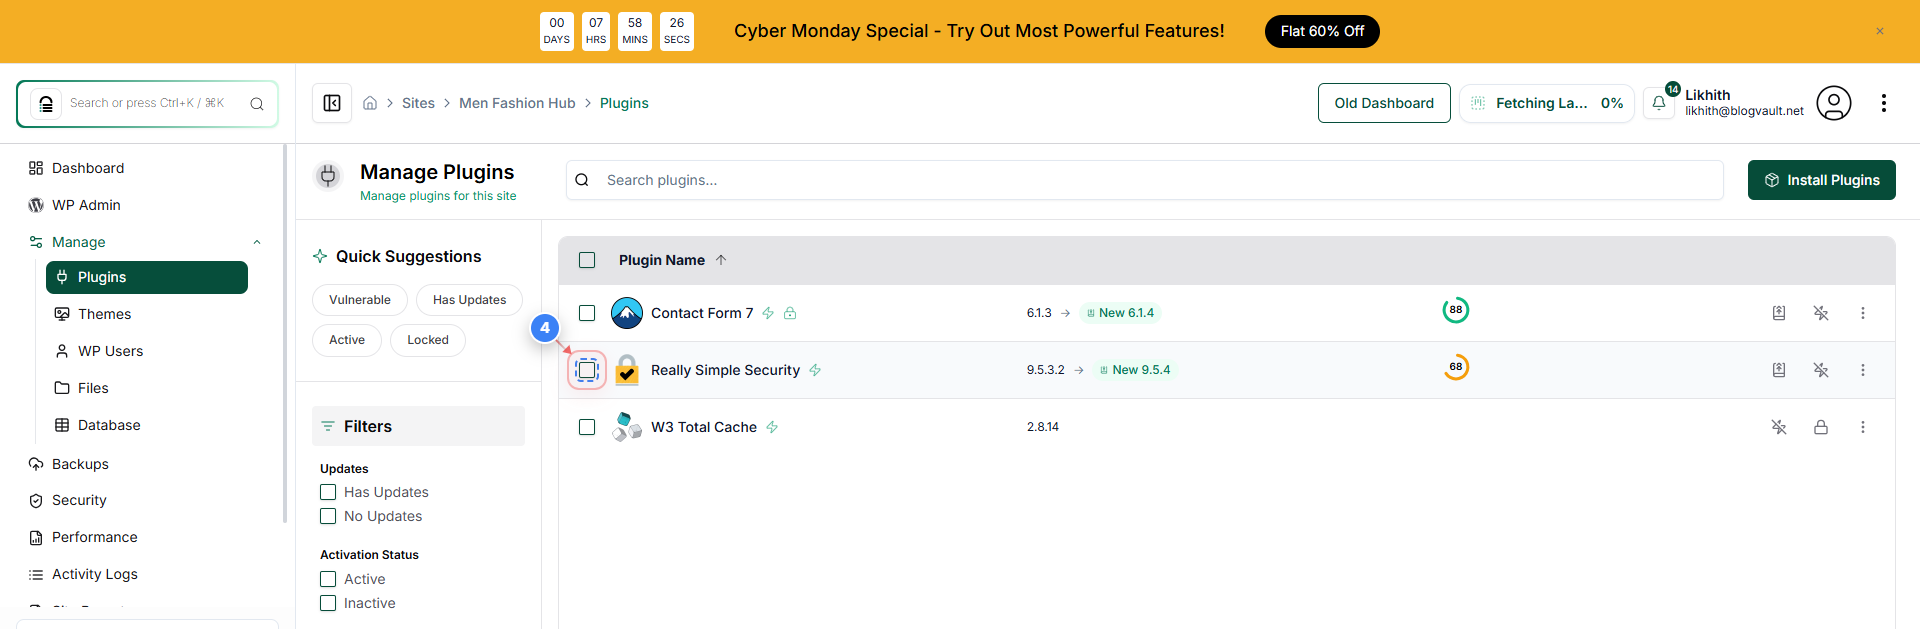
Step 4 of 12
Select Plugin for Update
Locate the plugin you want to update (e.g., *Really Simple Security*) and click the **checkbox** next to its name to select it.
Note: Selecting a plugin makes bulk actions, like updating, available.
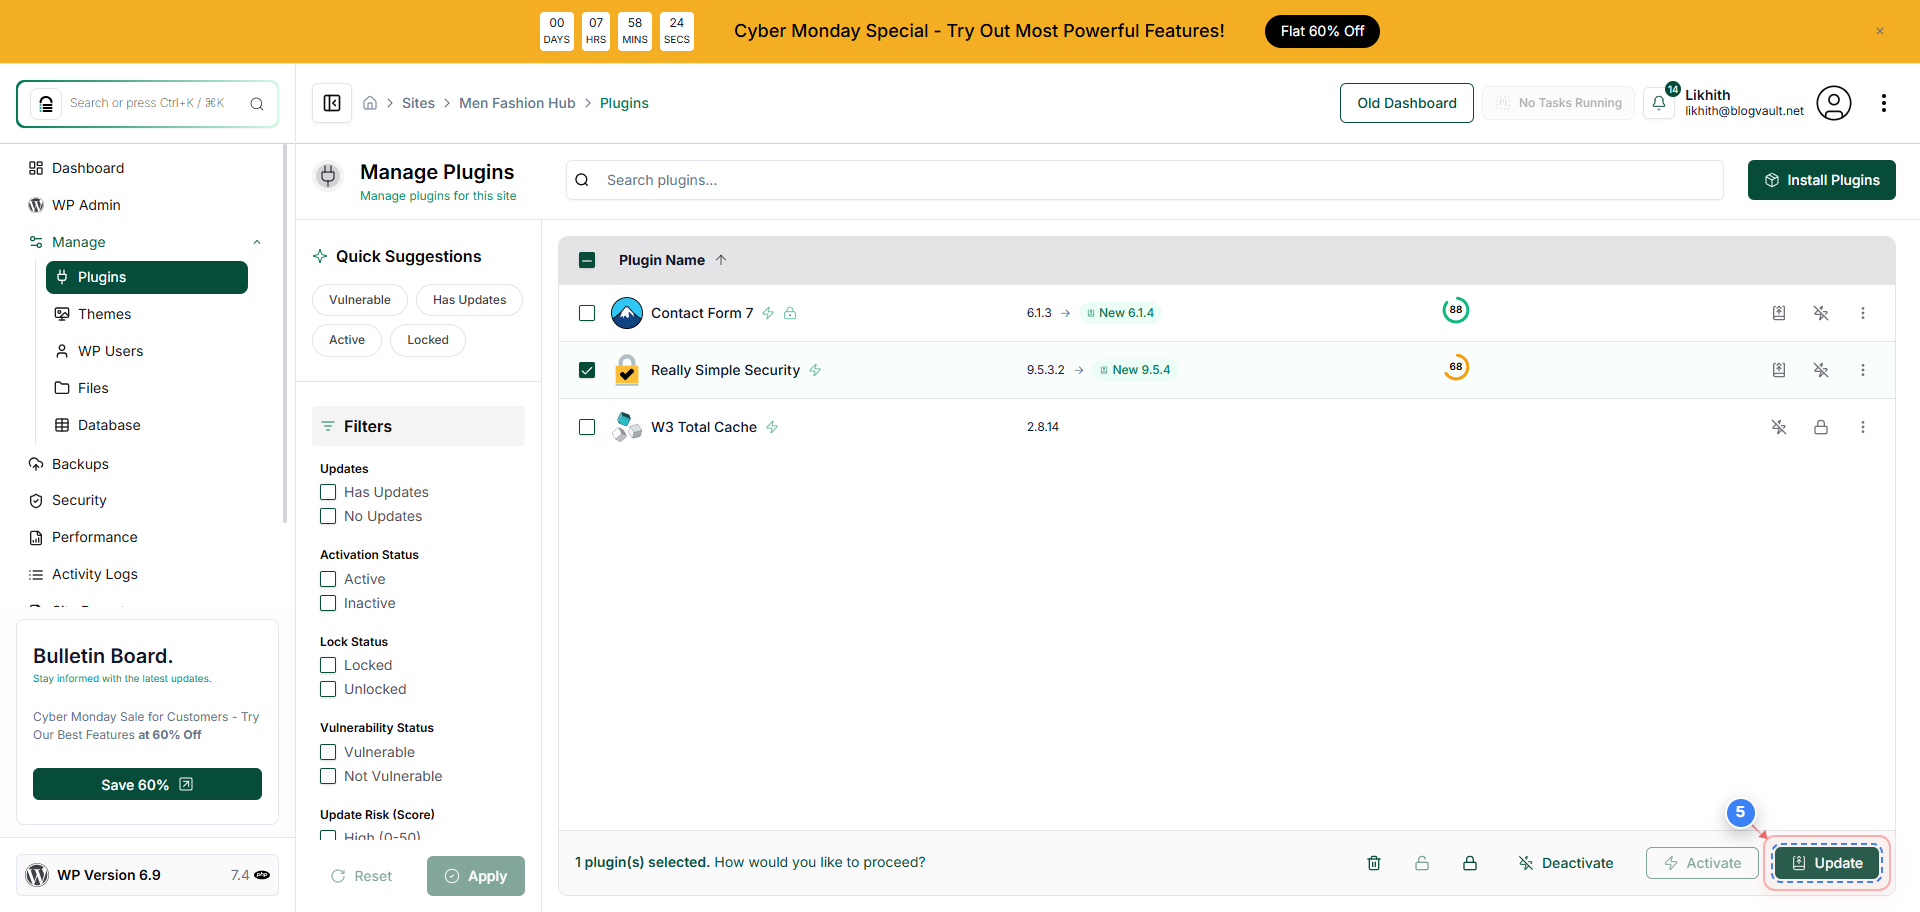
Step 5 of 12
Start the Update Process
Click the **Update button** (often represented by a circular arrow/refresh icon) in the action bar at the bottom of the screen to open the 'Update Options' menu.
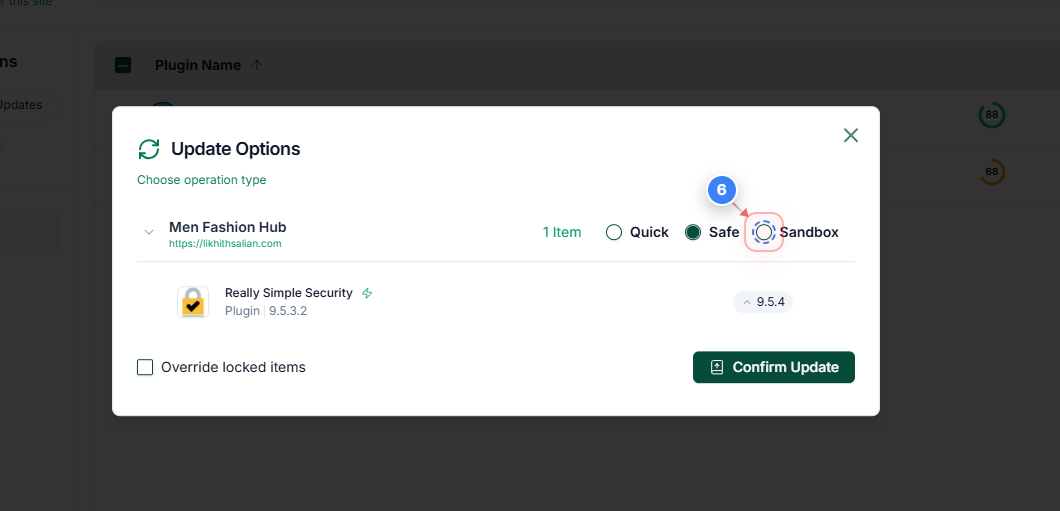
Step 6 of 12
Choose Sandbox Update Mode
In the 'Update Options' dialog box, ensure the **Sandbox** radio button is selected. This mode performs the update in a temporary Sandbox environment first.
Note: Choosing 'Sandbox' prevents potential issues from affecting your live site immediately.
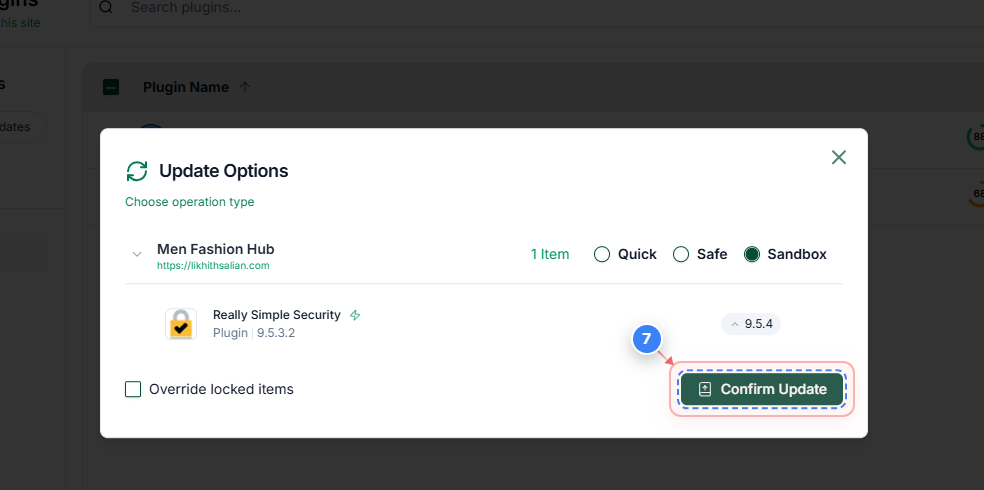
Step 7 of 12
Confirm Sandbox Update
Click the **Confirm Update** button within the dialog to begin the plugin update process on the Sandbox site.
Note: A new task will be initiated to create the sandbox, update the plugin, and generate a task report.
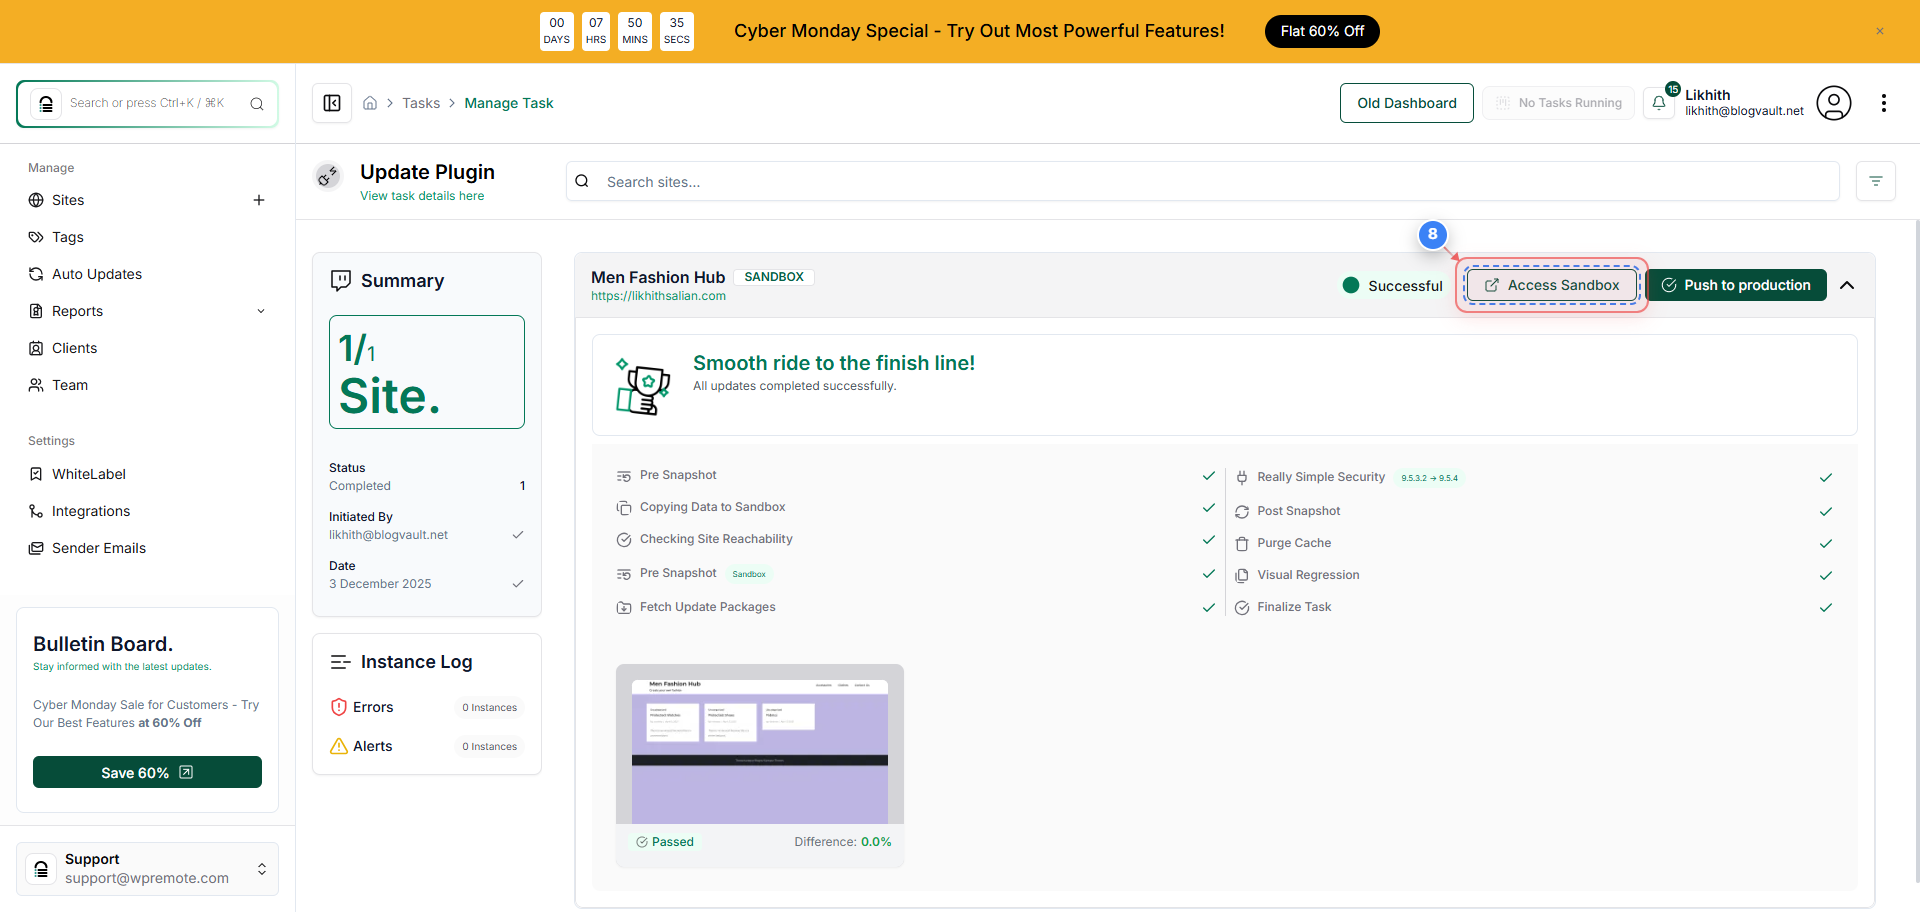
Step 8 of 12
Access Sandbox Link
After the Sandbox task is successful, look for the section displaying the Sandbox status and click the button to **Access Sandbox** credentials and link.
Note: This opens a window with the temporary URL and login details for the test environment.
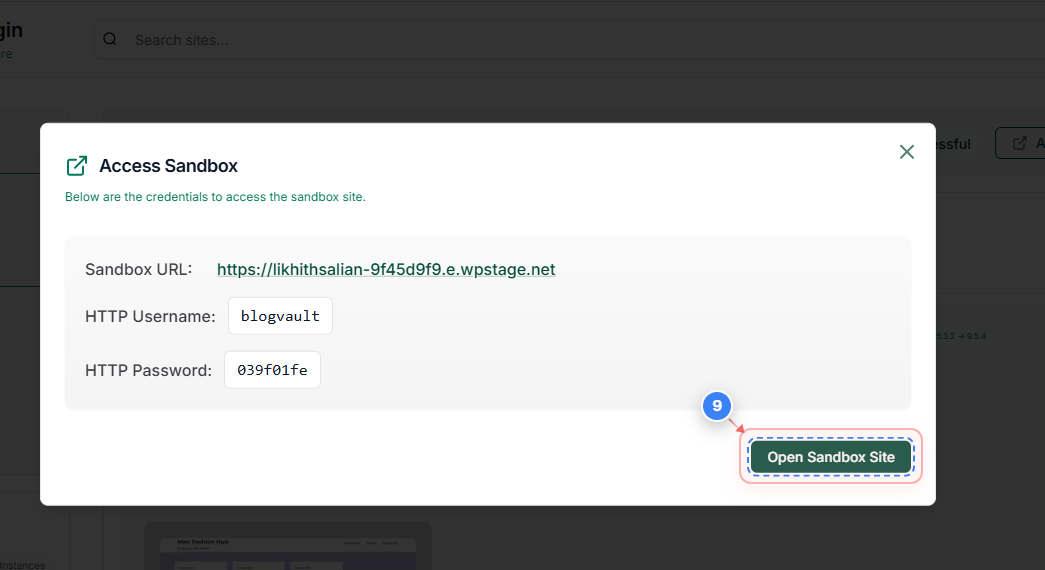
Step 9 of 12
Open Sandbox Site
In the 'Access Sandbox' window, click the **Open Sandbox Site** button to view the site and verify the updated plugin functionality.
Note: Use the provided HTTP authentication temporary credentials to access the Sandbox site.
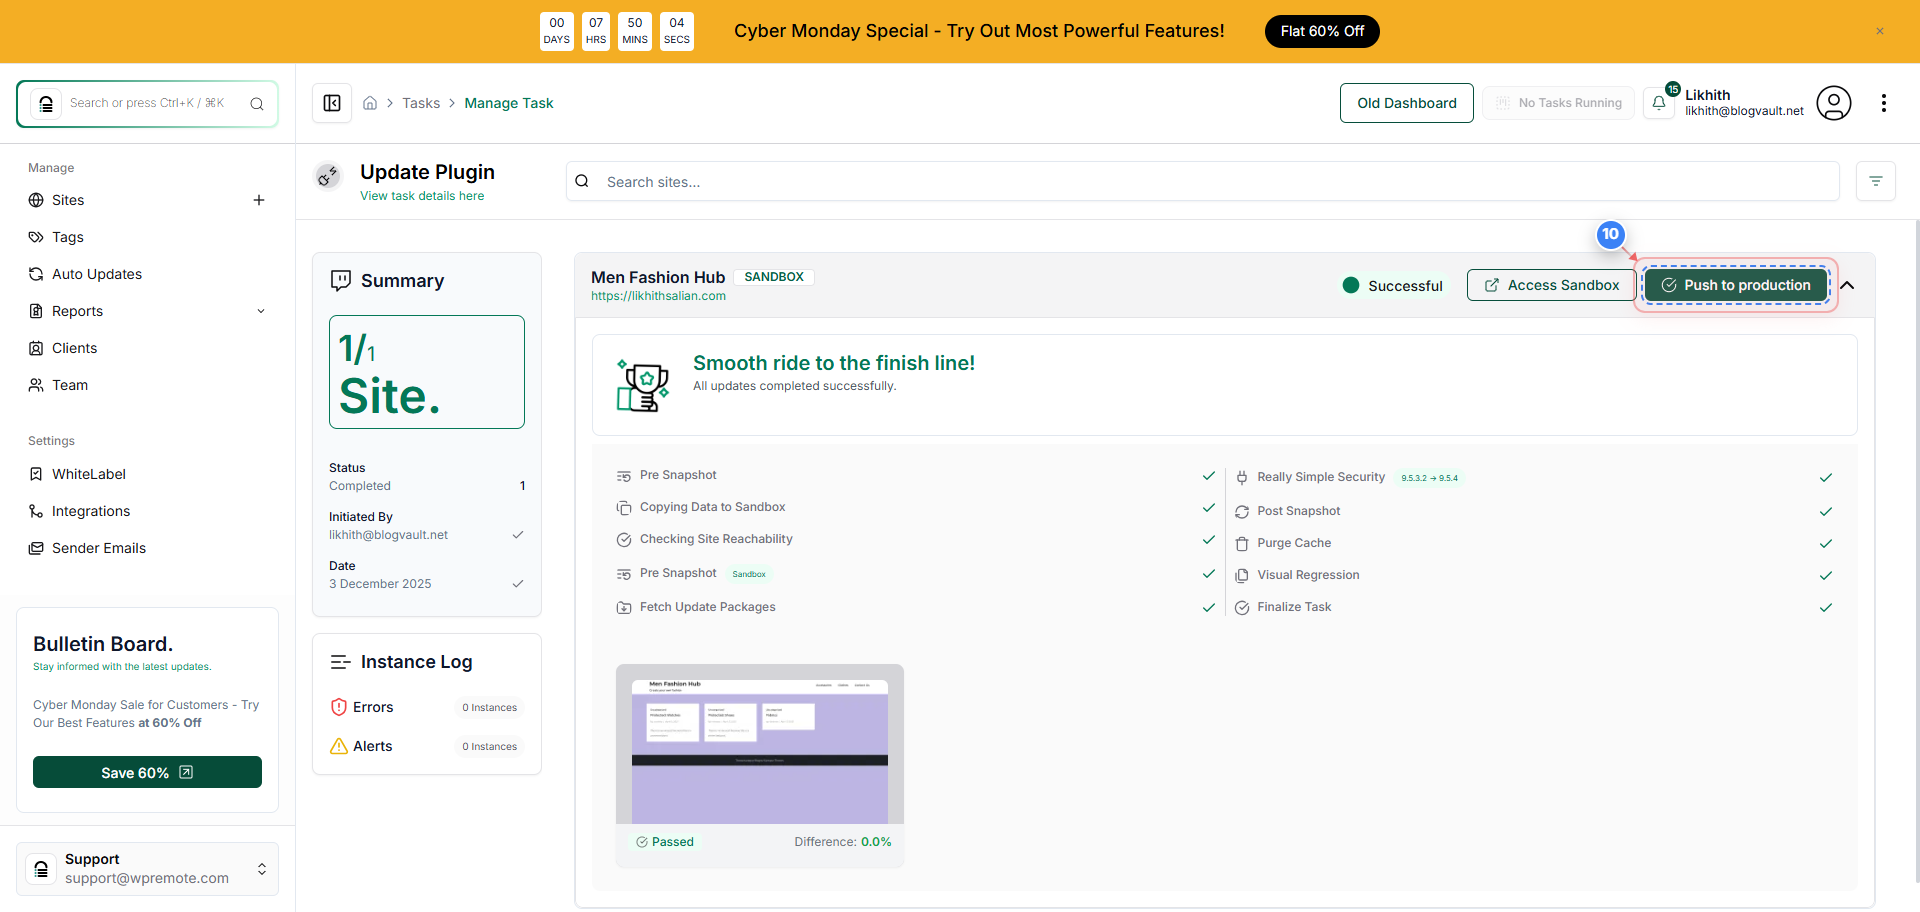
Step 10 of 12
Push Changes to Production
Once testing is complete and successful, return to the Task Details page and click the **Push to Production** button to apply the changes from the Sandbox to your live site.
Note: This begins the final deployment of the tested changes.
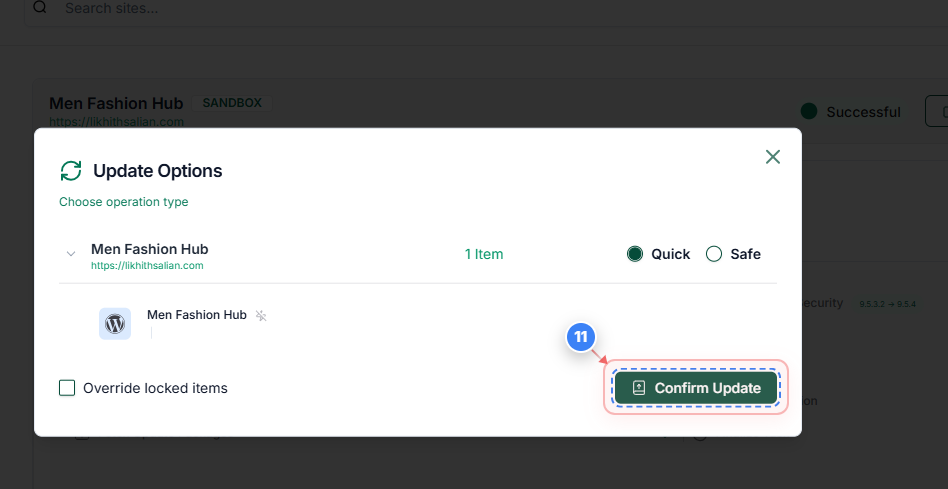
Step 11 of 12
Confirm Production Update
In the final 'Update Options' dialog, click the **Confirm Update** button to complete the process and apply the updated plugin to your live site.
Note: A new task will run to finalise the deployment.
Step 12 of 12
View Final Status
The final page displays the successful **Completed** status, confirming the plugin was updated on your live site using the safe, Sandbox-first method.
Note: You can review the instance logs and change details on this task completion page.