How Do I remove a Website from My Account?
Step 1 of 4
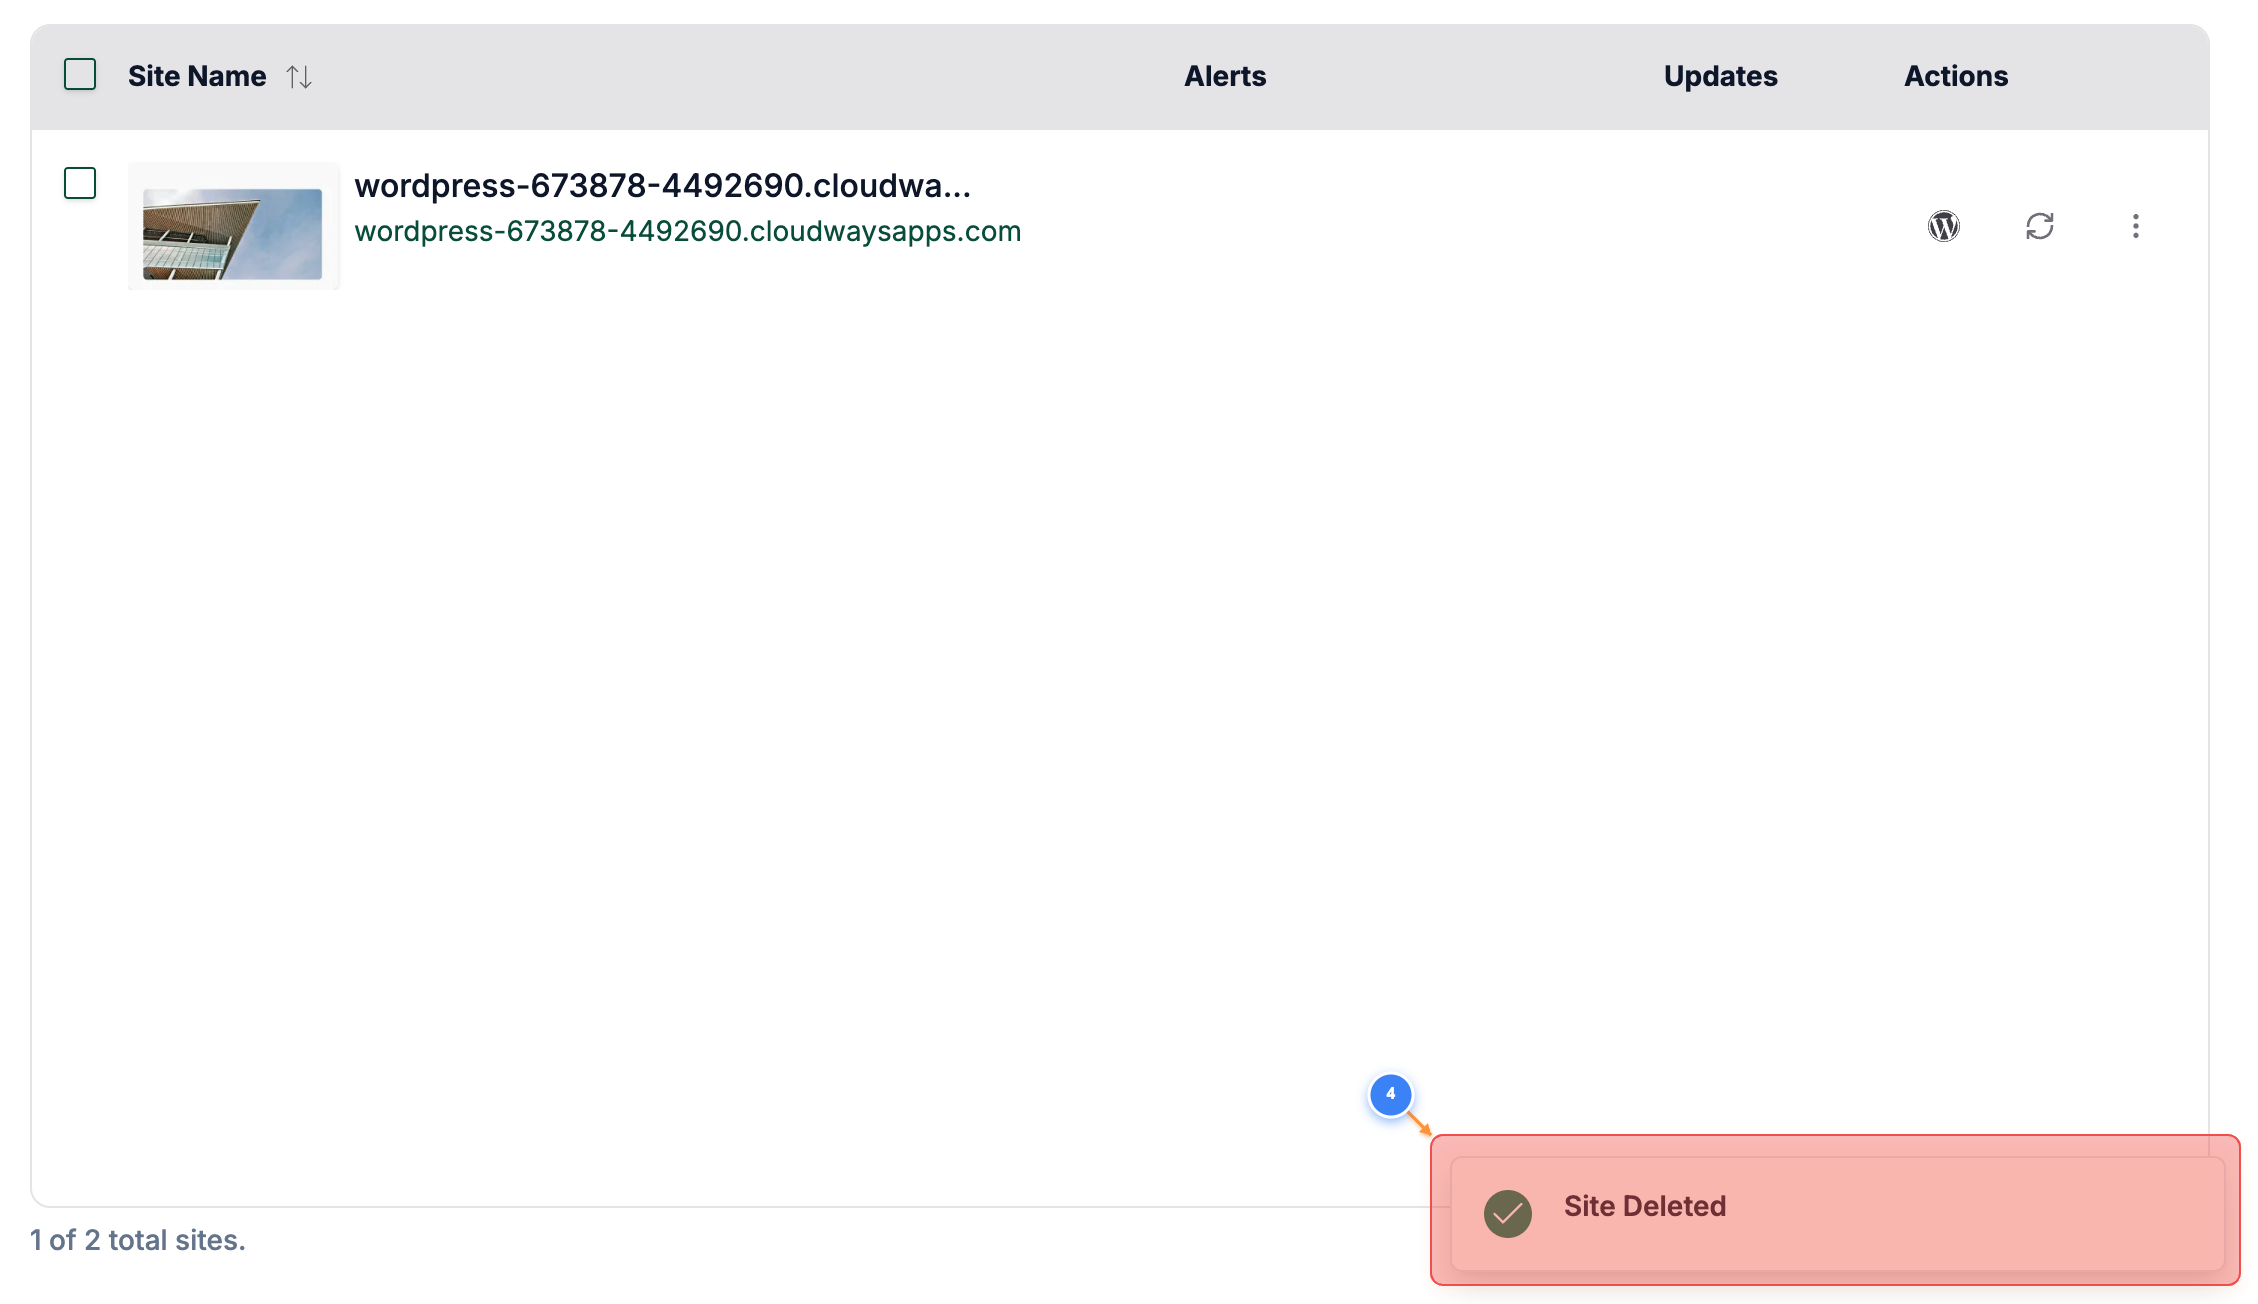
Open the site details page
Click on your site name on the Sites Listing page to open site management options.
Note: This opens the detailed view where you can manage settings and actions for the selected site.
Step 2 of 4
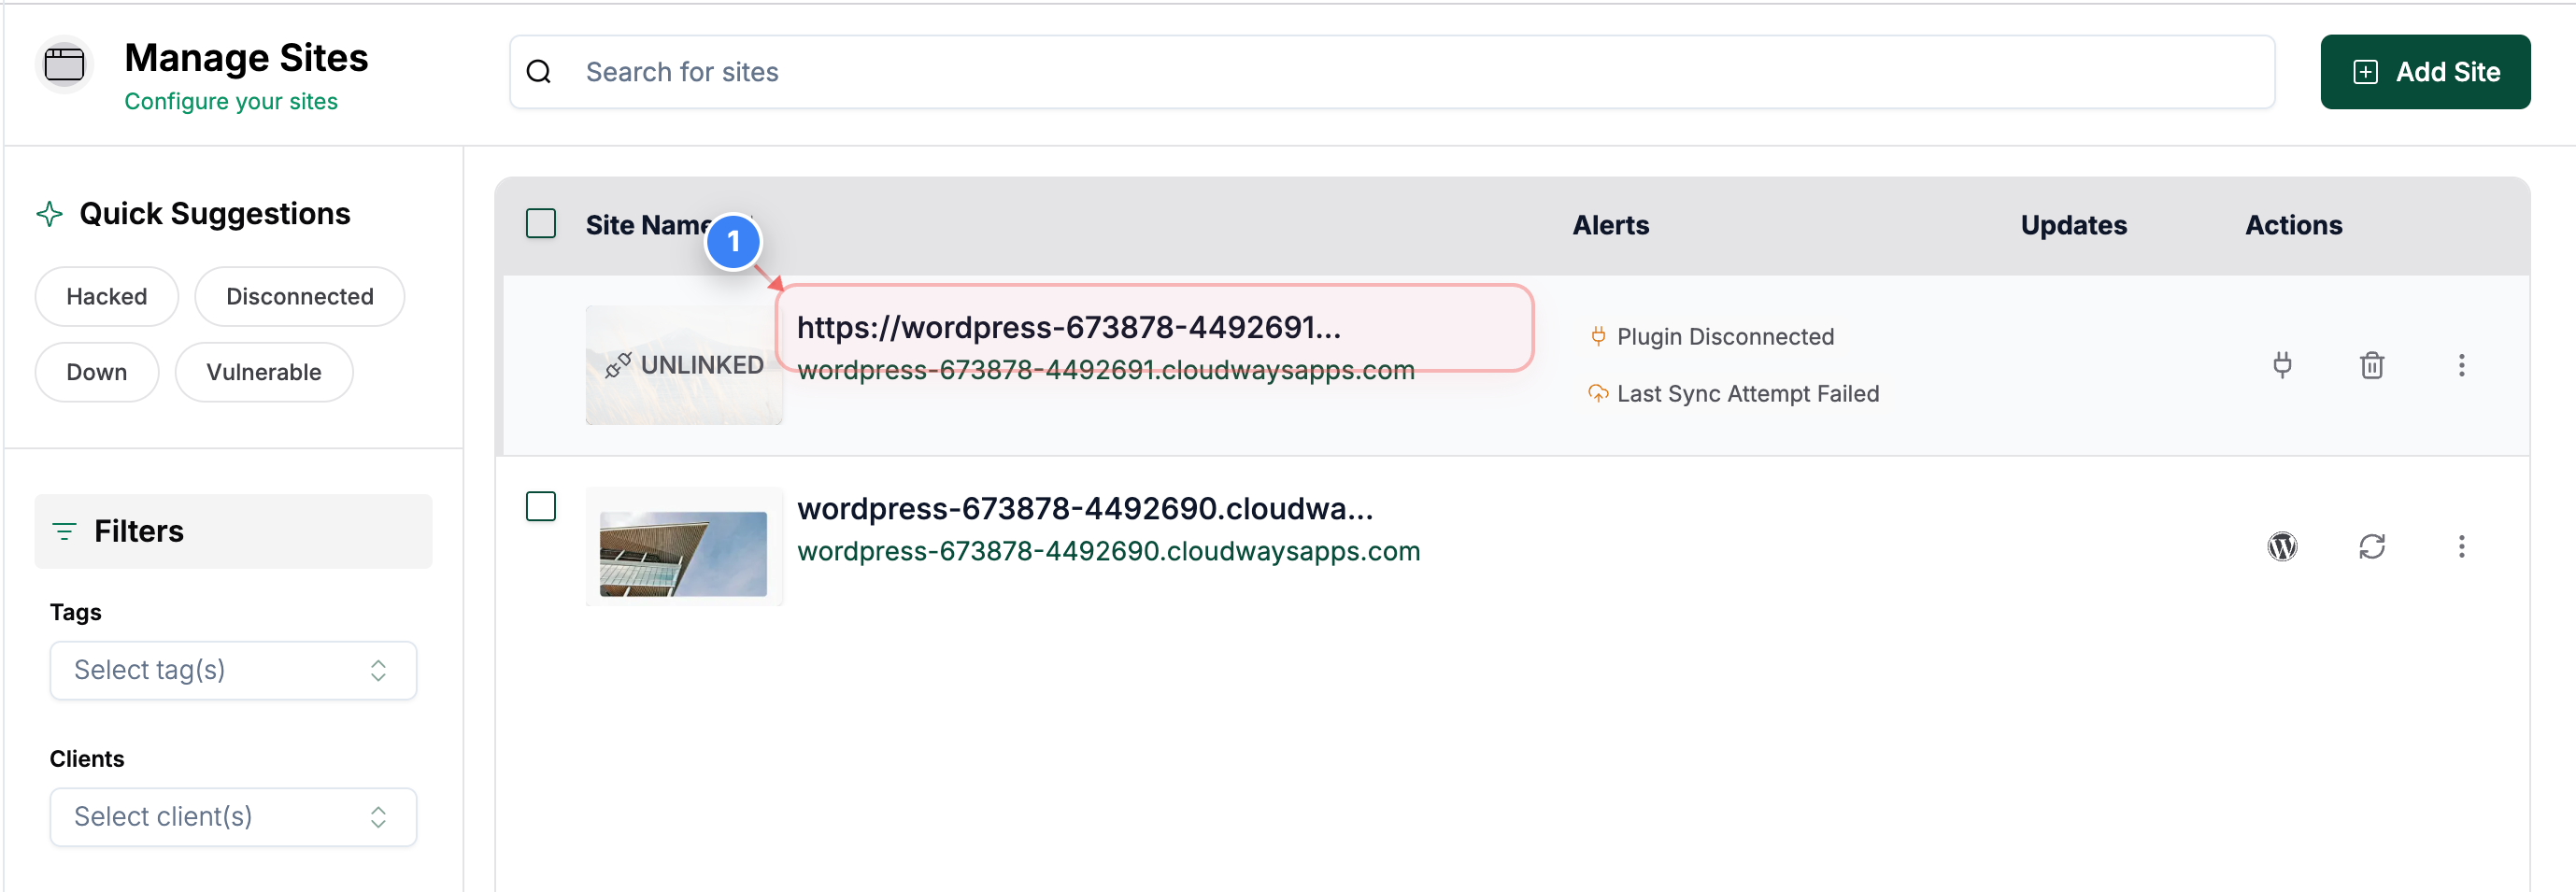
Start site deletion
Click the "Delete Site" button in the top-right area of the site details page to begin removing the site from your account.
Note: Deleting a site removes it from your dashboard but does not affect your actual hosting account.
Step 3 of 4
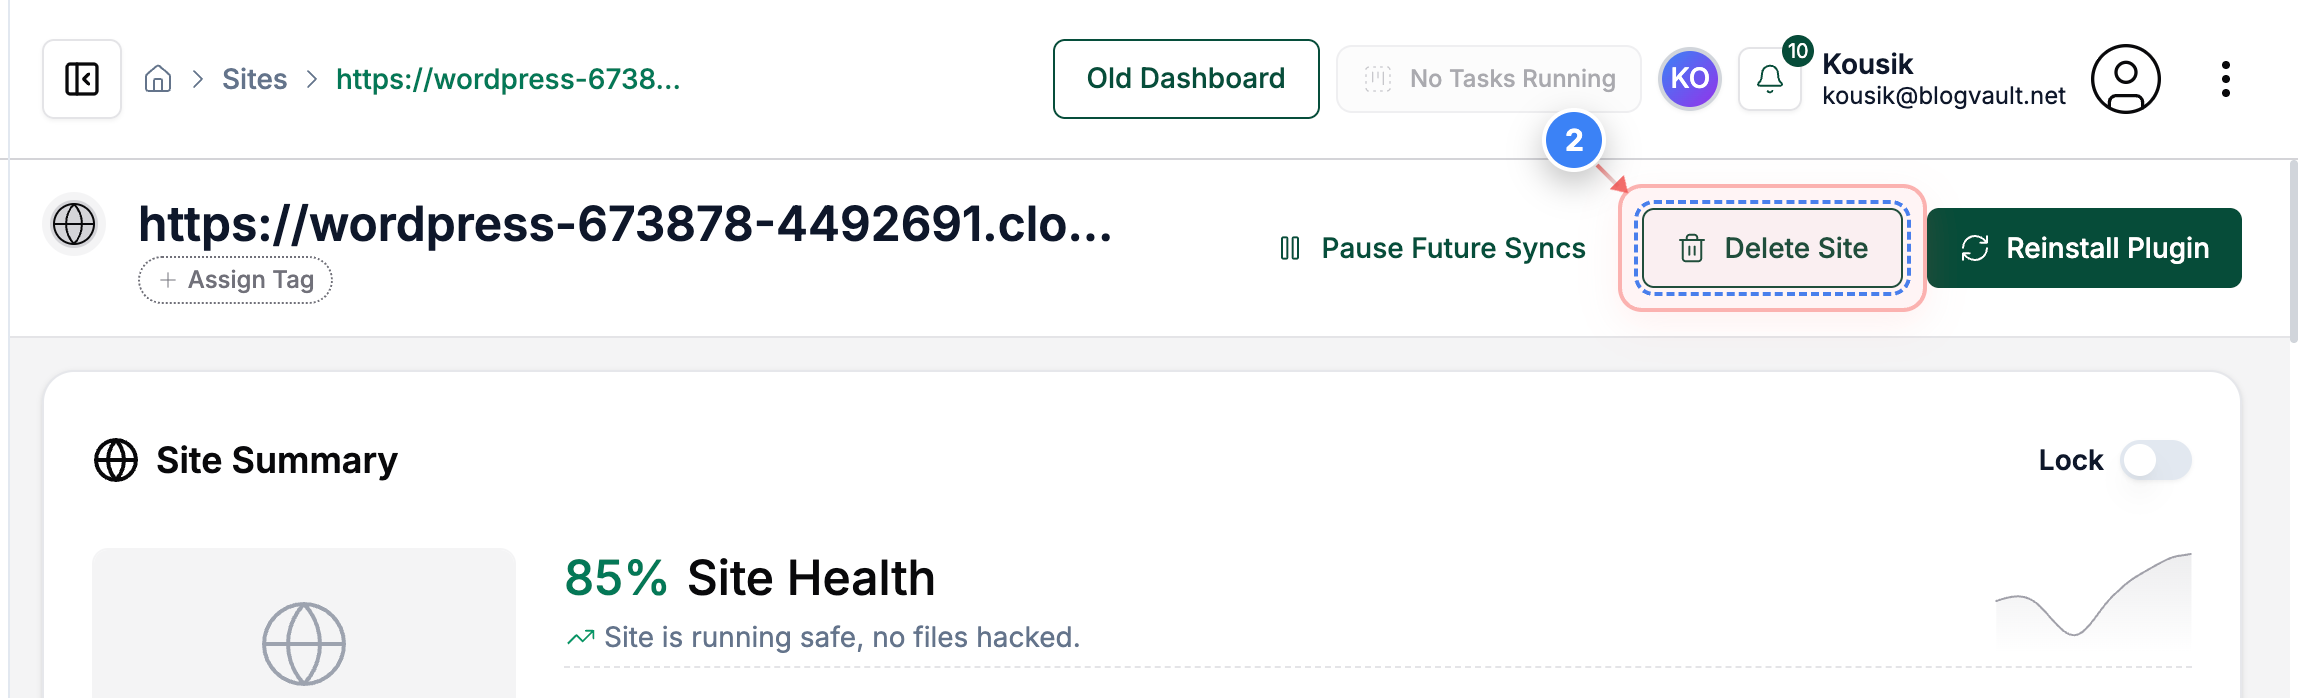
Confirm deletion
Click the Delete Site button in the confirmation pop-up at the center of the screen to confirm site removal.
Note: This action cannot be undone, so ensure the correct site URL is shown before confirming.
Step 4 of 4
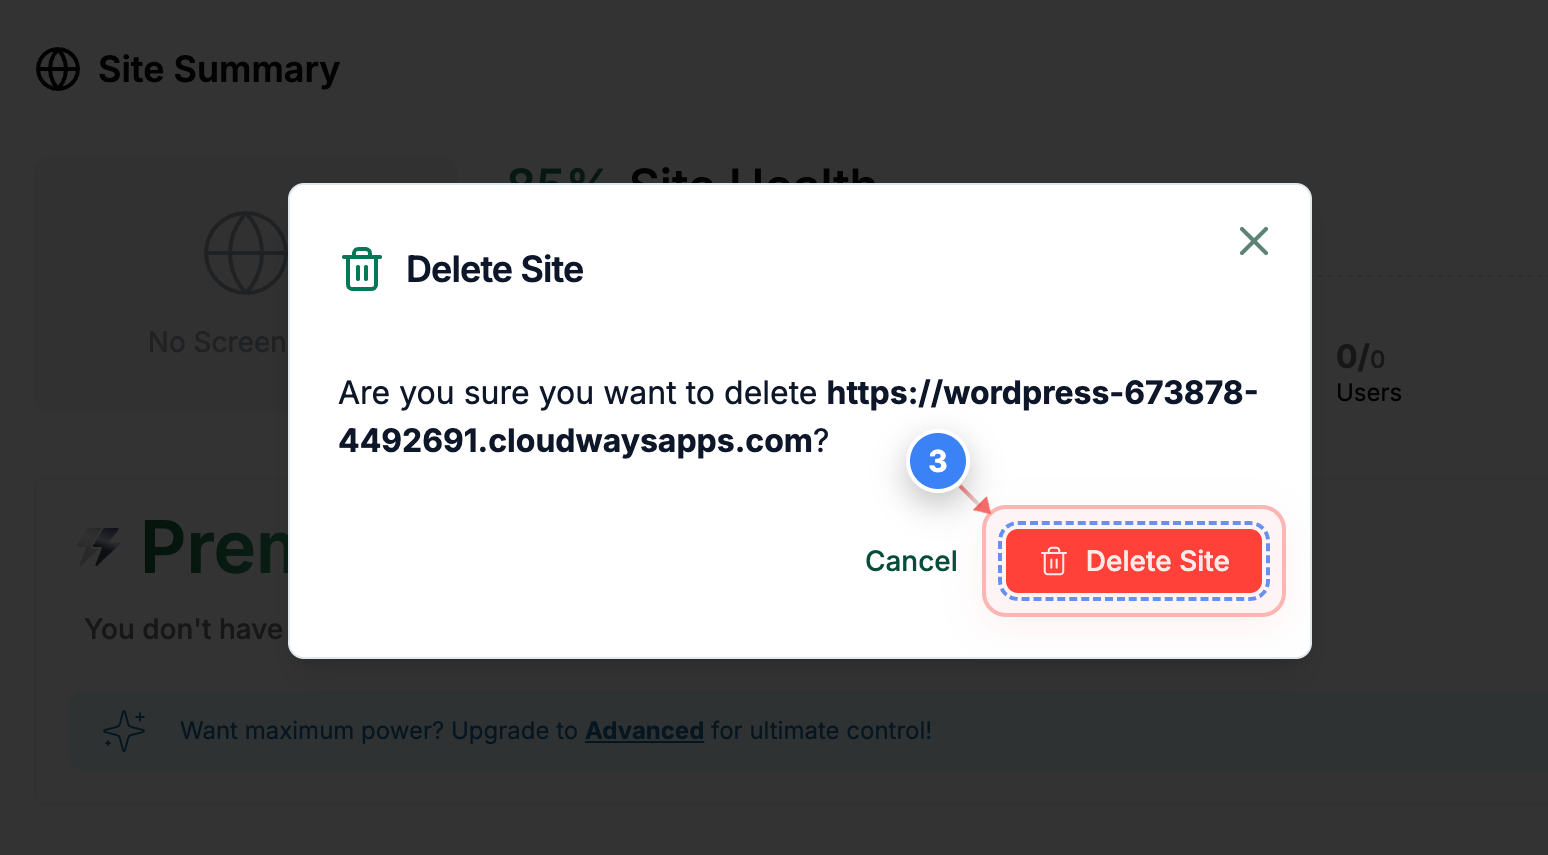
Verify site removal
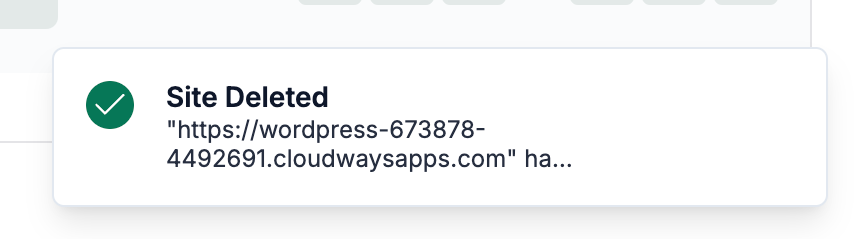
On the Sites page, a success message indicates the site was removed.
Note: If the site still appears, refresh the page or check for any error notifications before retrying the deletion.
Otherwise, you can also delete any sites from the Sites Listing page.
Step 1 of 4
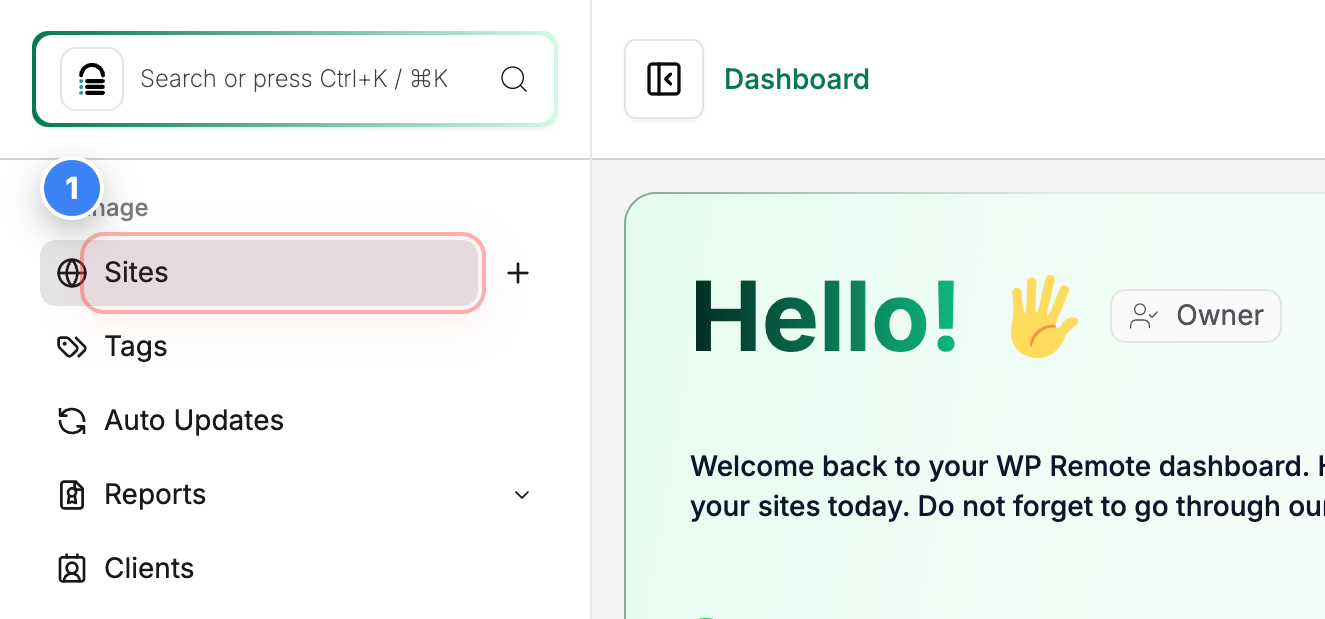
Open sites list
Click on Sites in the top-left sidebar to open the list of all sites present in your account.
Step 2 of 4
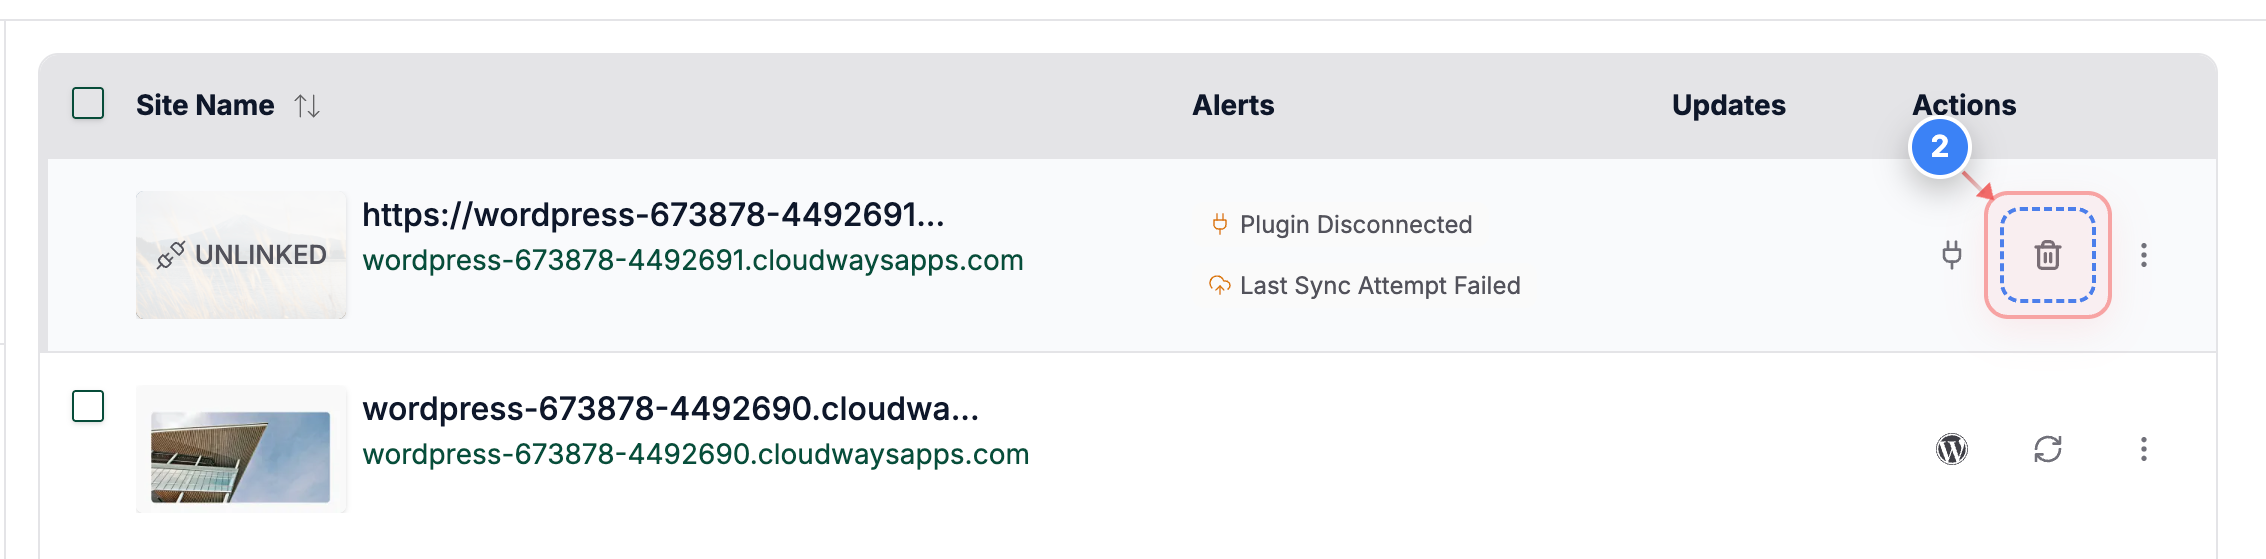
Delete Site
Click the "Delete" button on the right side of the site row to delete that specific site.
Note: Each site row has its own action controls, so make sure you select the correct site before proceeding.
Step 3 of 4
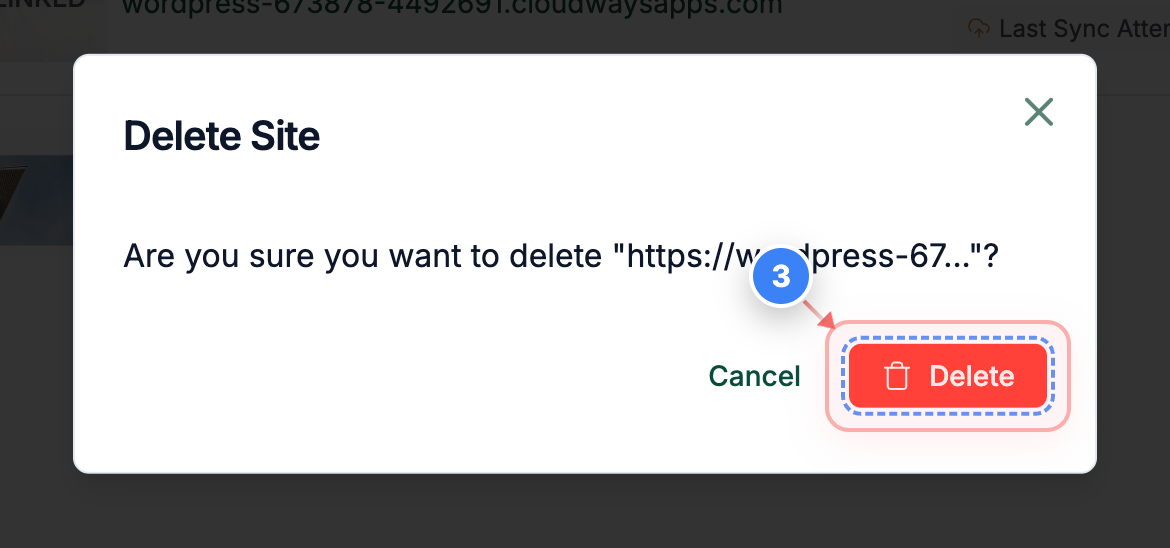
Confirm site deletion
Click the Delete button in the pop-up at the center of the screen to permanently remove the selected site.
Step 4 of 4
Verify deletion status
A success notification at the bottom of the page indicates the site was deleted.
Note: If the site still appears, refresh the page or check for any error notifications before retrying.