How Do I Integrate My Google Analytics Account?
Step 1 of 9
Access Site Management Options
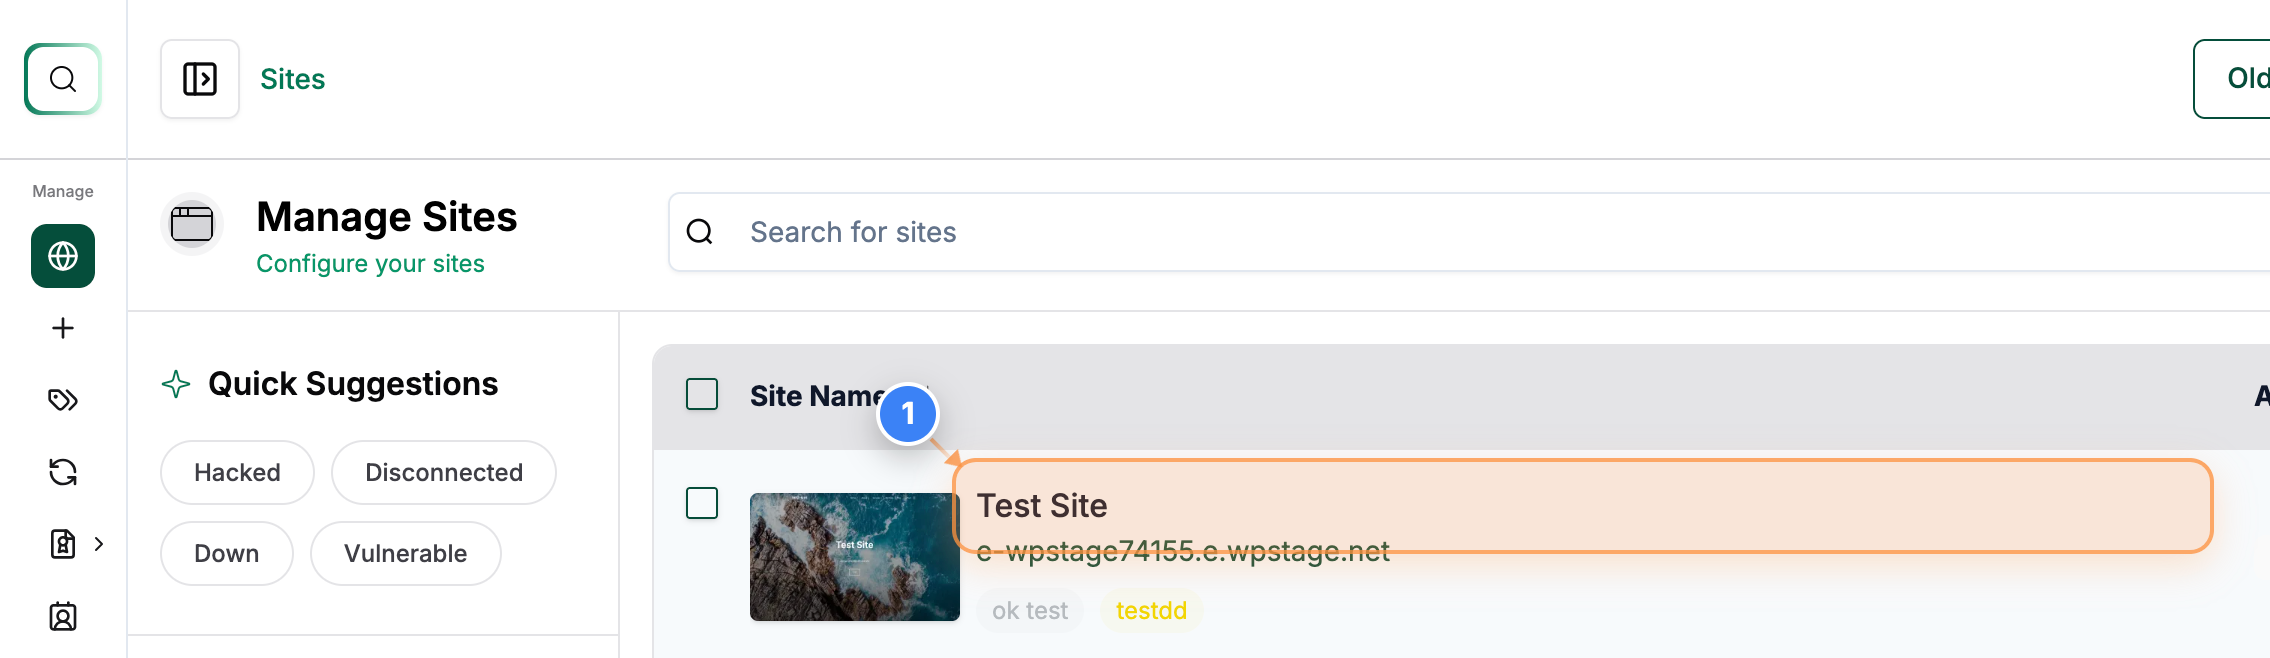
Click on the Your Site in the site list area to open site management options.
Note: This takes you to the Site Overview dashboard for the selected site.
Step 2 of 9
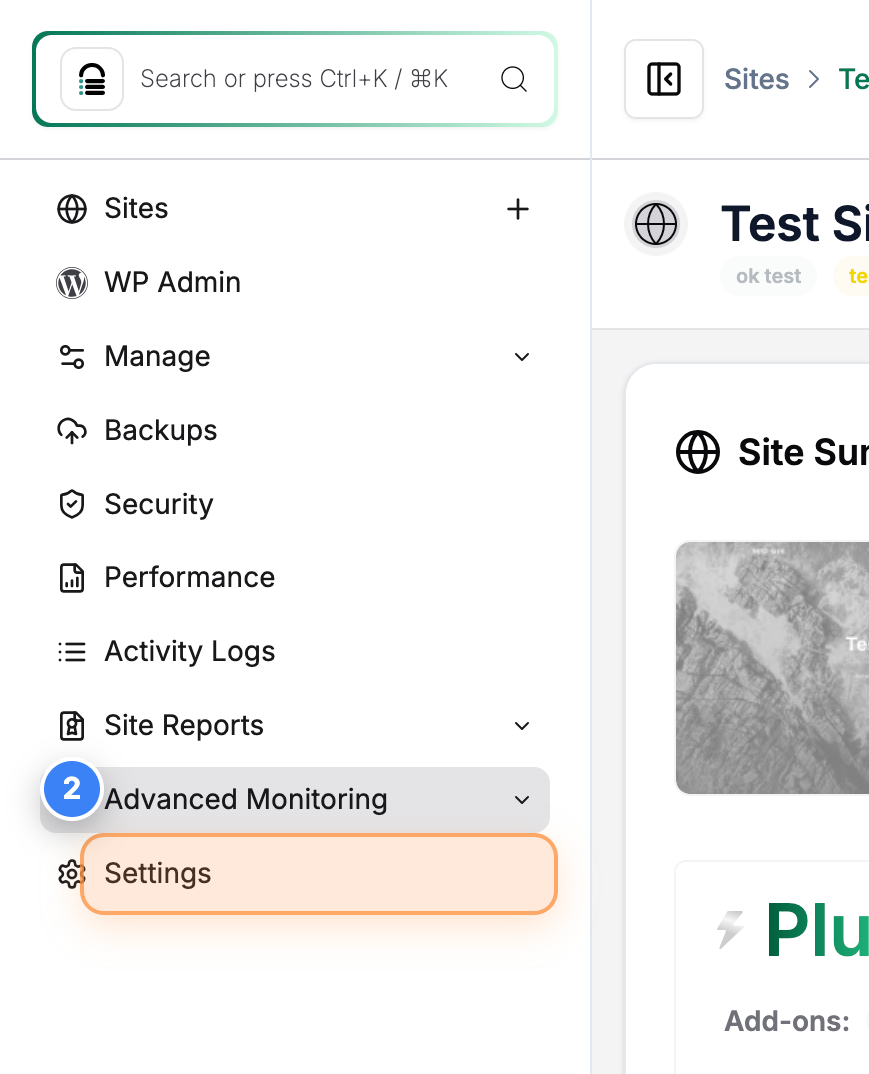
Open Site Settings
In the left-hand sidebar menu, click on Settings to access the site configuration.
Step 3 of 9
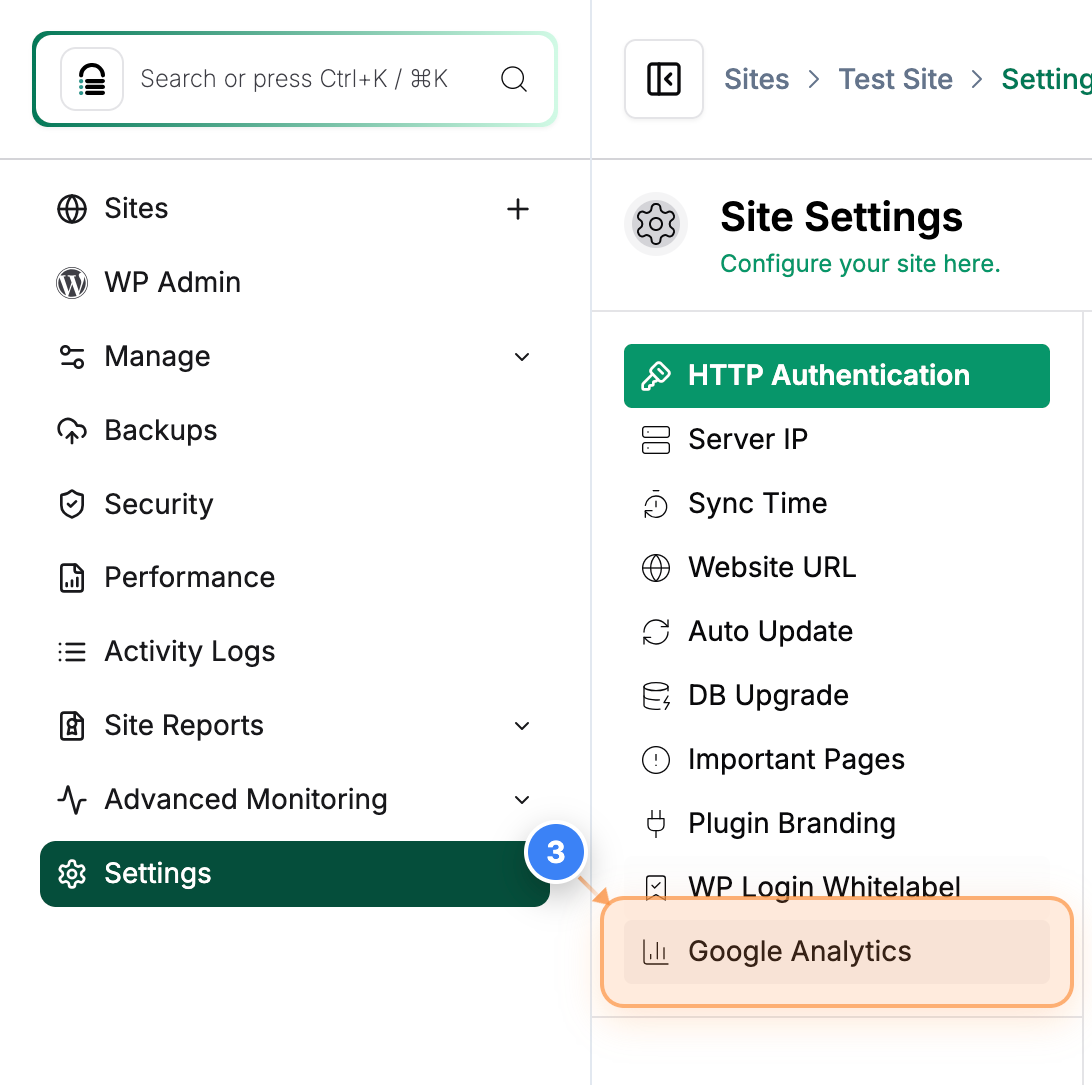
Select Google Analytics Settings
In the Site Settings sidebar, click on Google Analytics to manage the connection.
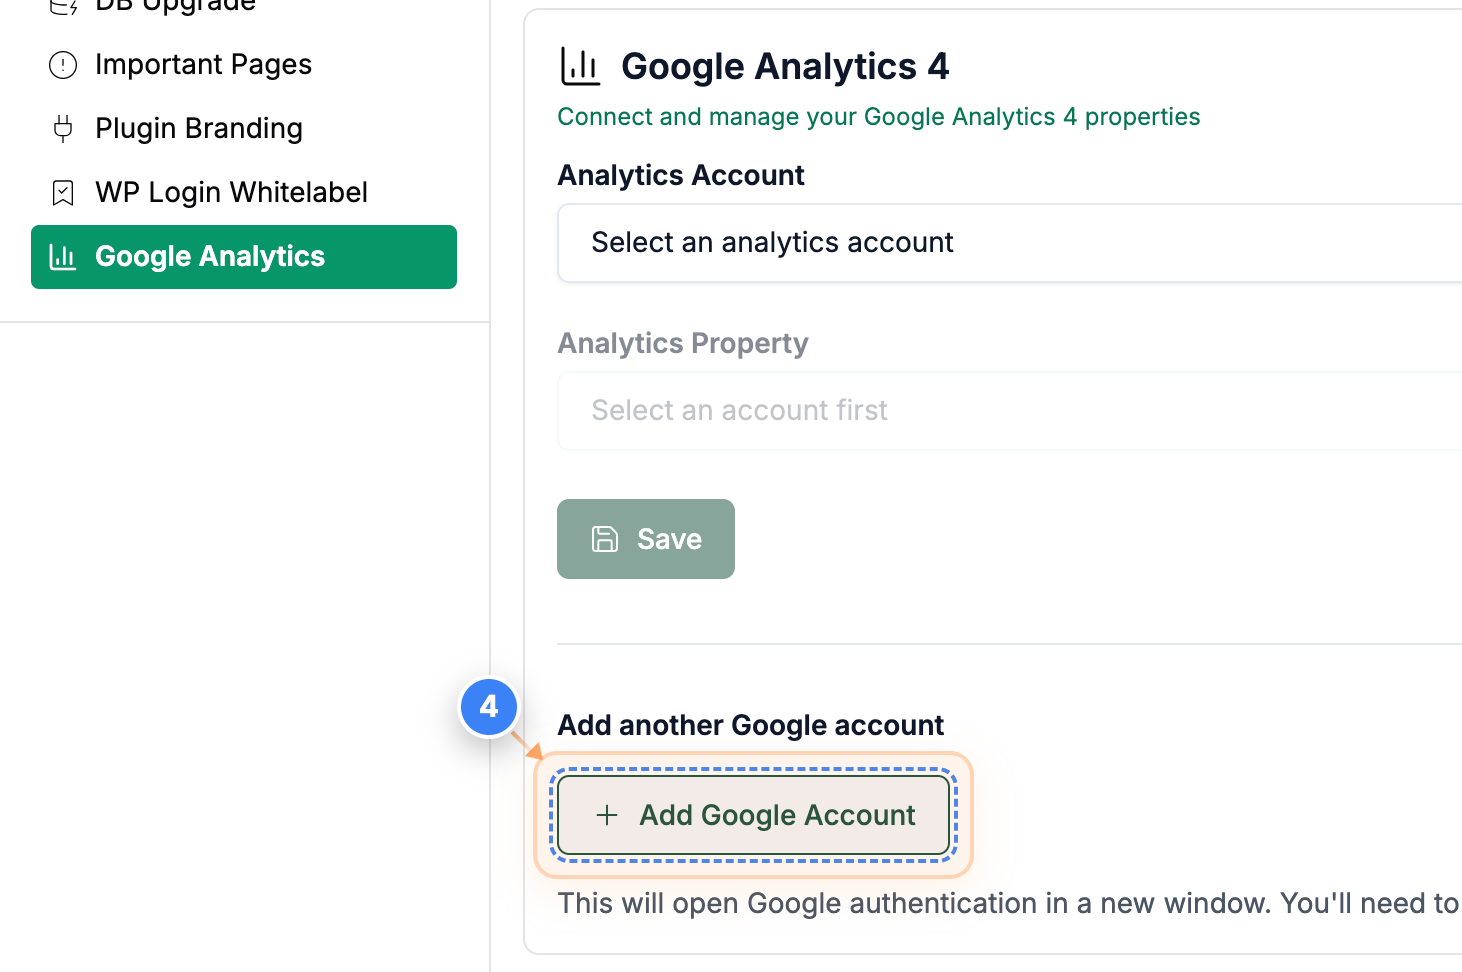
Step 4 of 9
Initiate Google Account Connection
Click the Add Google Account button to begin the connection process. A new Google authentication window will open.
Note: You will be prompted to grant permissions for the plugin to access your Google Analytics data.
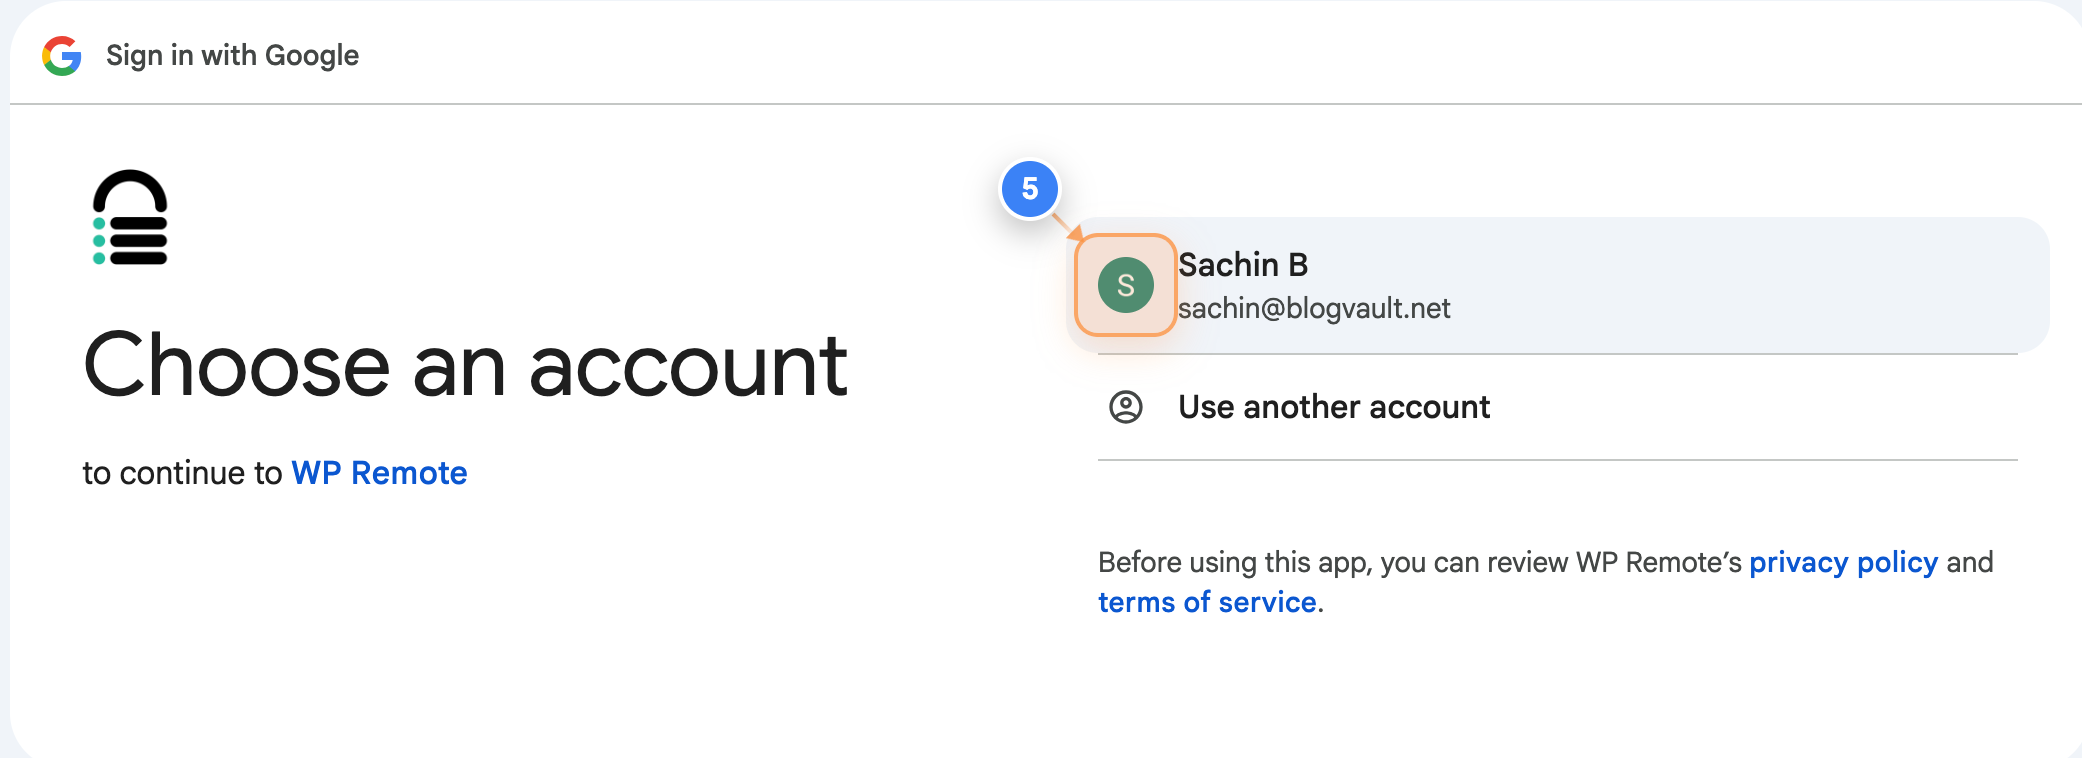
Step 5 of 9
Select Google Account
On the Google sign-in page, click on the desired Google Account to proceed with authentication.
Note: Ensure the account has access to the Google Analytics properties you wish to use.
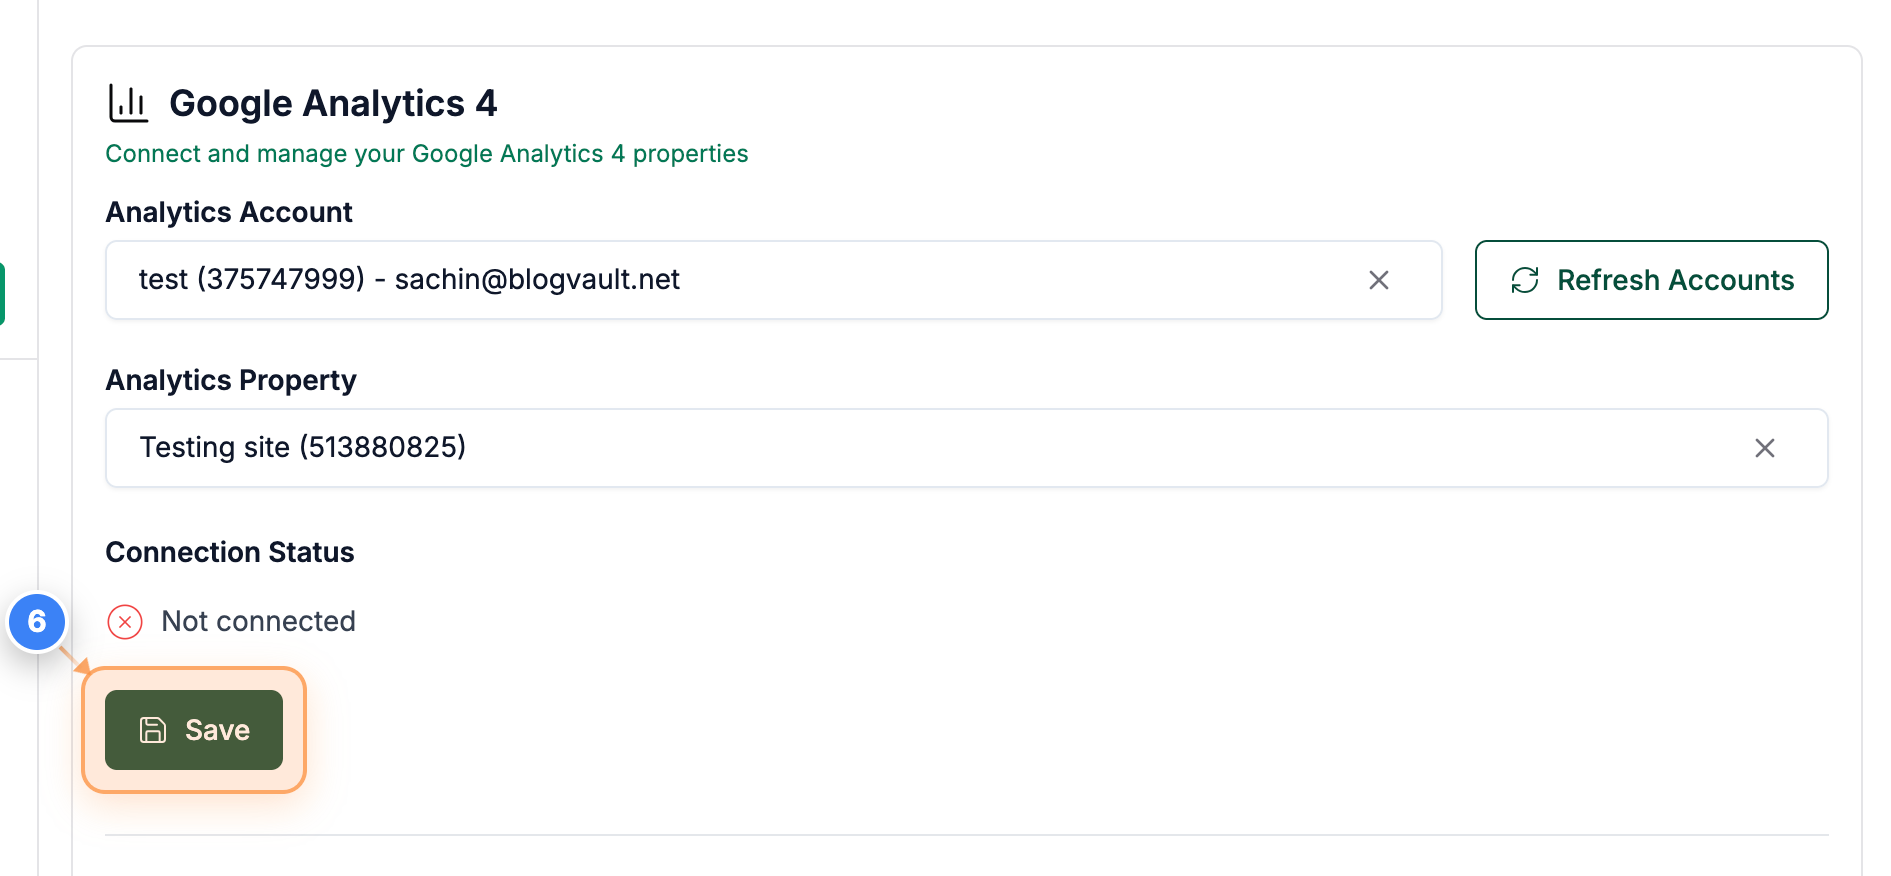
Step 6 of 9
Save Analytics Configuration
After authenticating with Google and selecting the required Analytics Account/Property, click the Save button to finalize the integration.
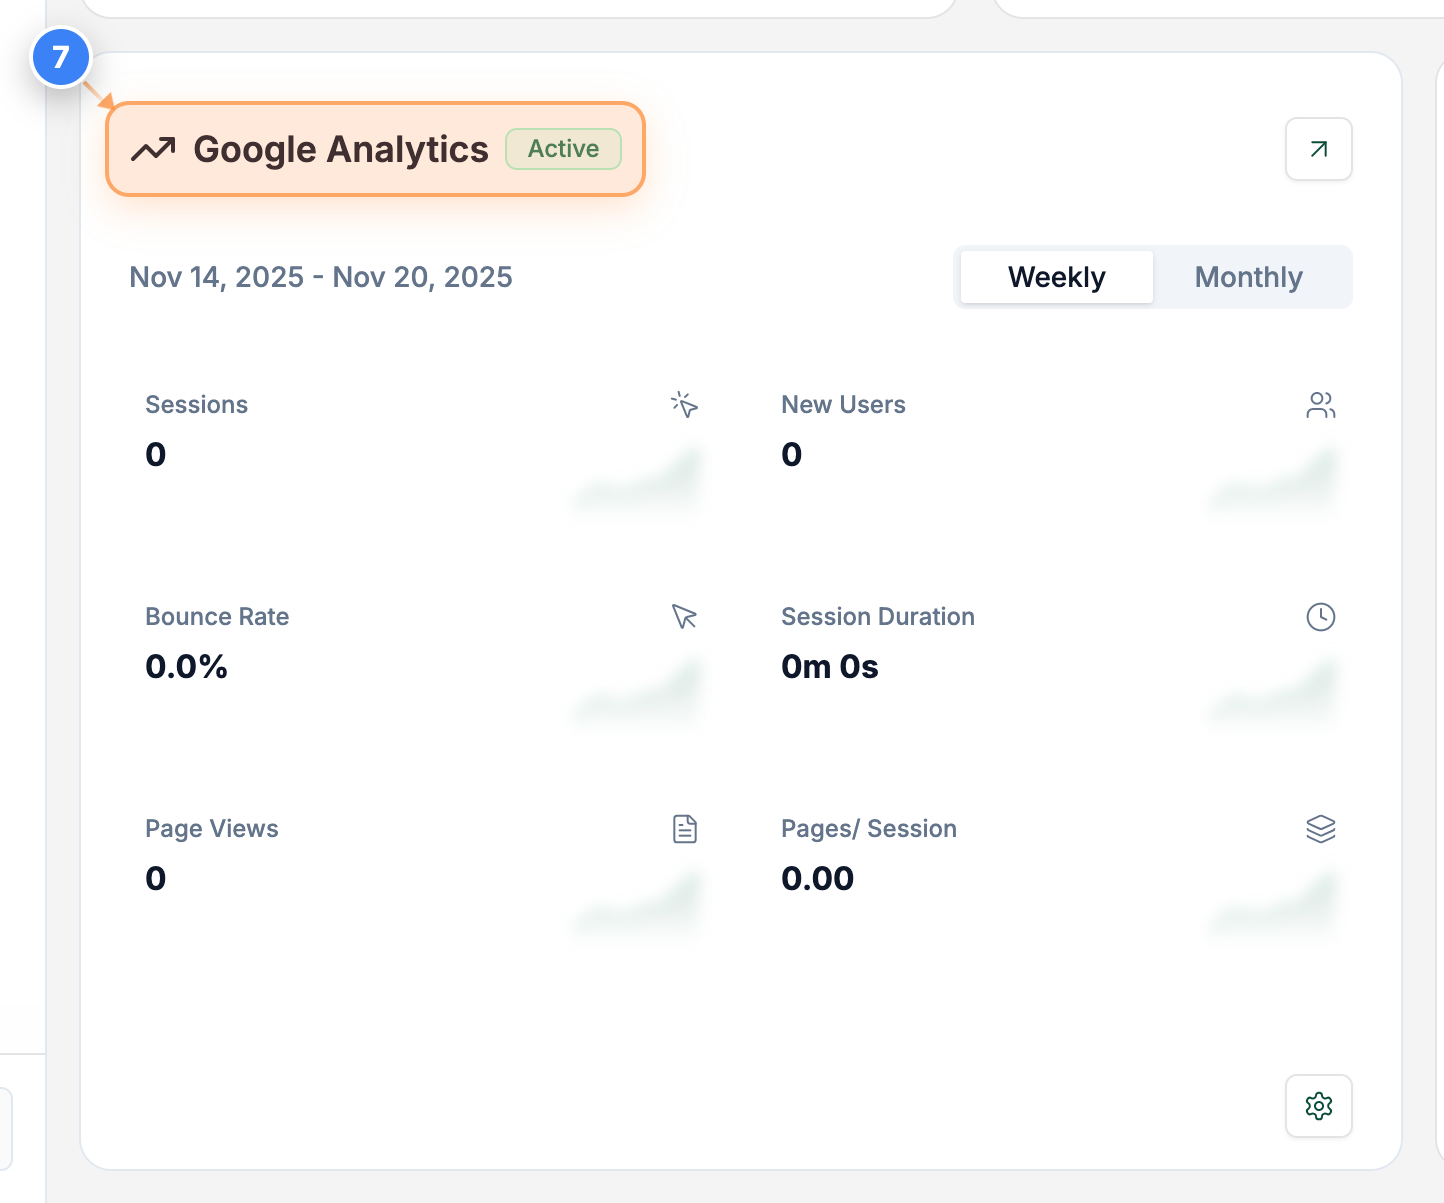
Step 7 of 9
View Analytics Status
On the Site Overview page, view the Google Analytics Status as Active.
Note: The card confirms the integration is active.
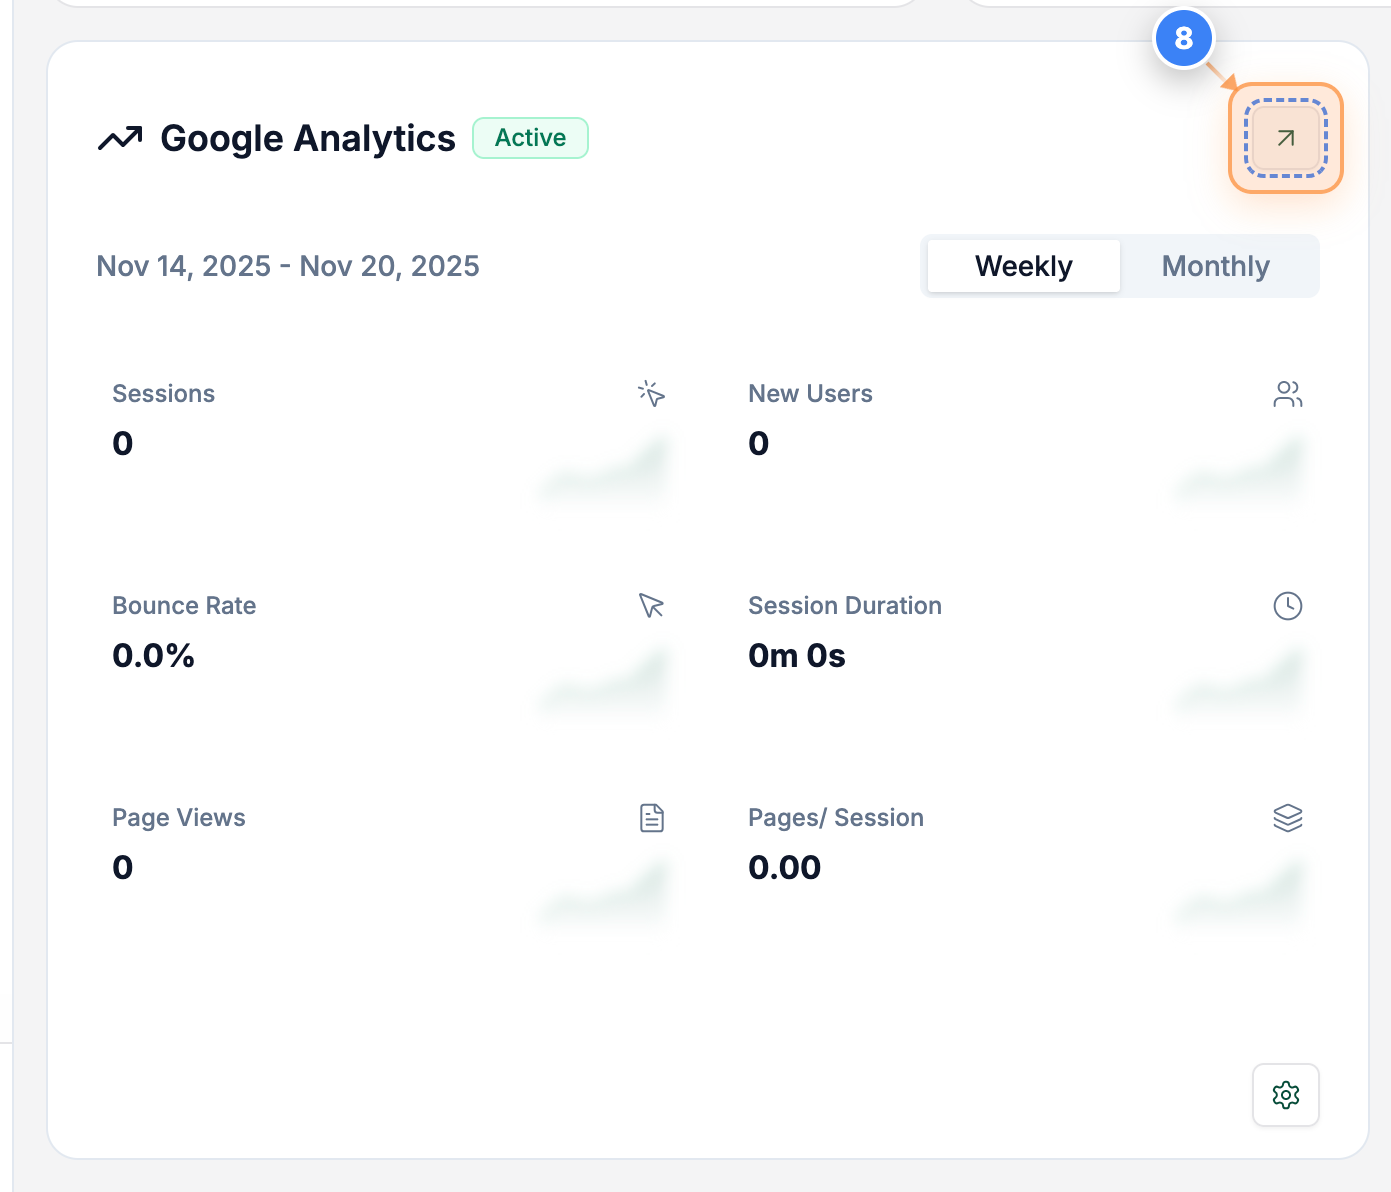
Step 8 of 9
Access Analytics Details (Alternative)
Alternatively, click the small expand icon button on the Google Analytics card to navigate directly to the detailed analytics dashboard.
Step 9 of 9
View Analytics Details
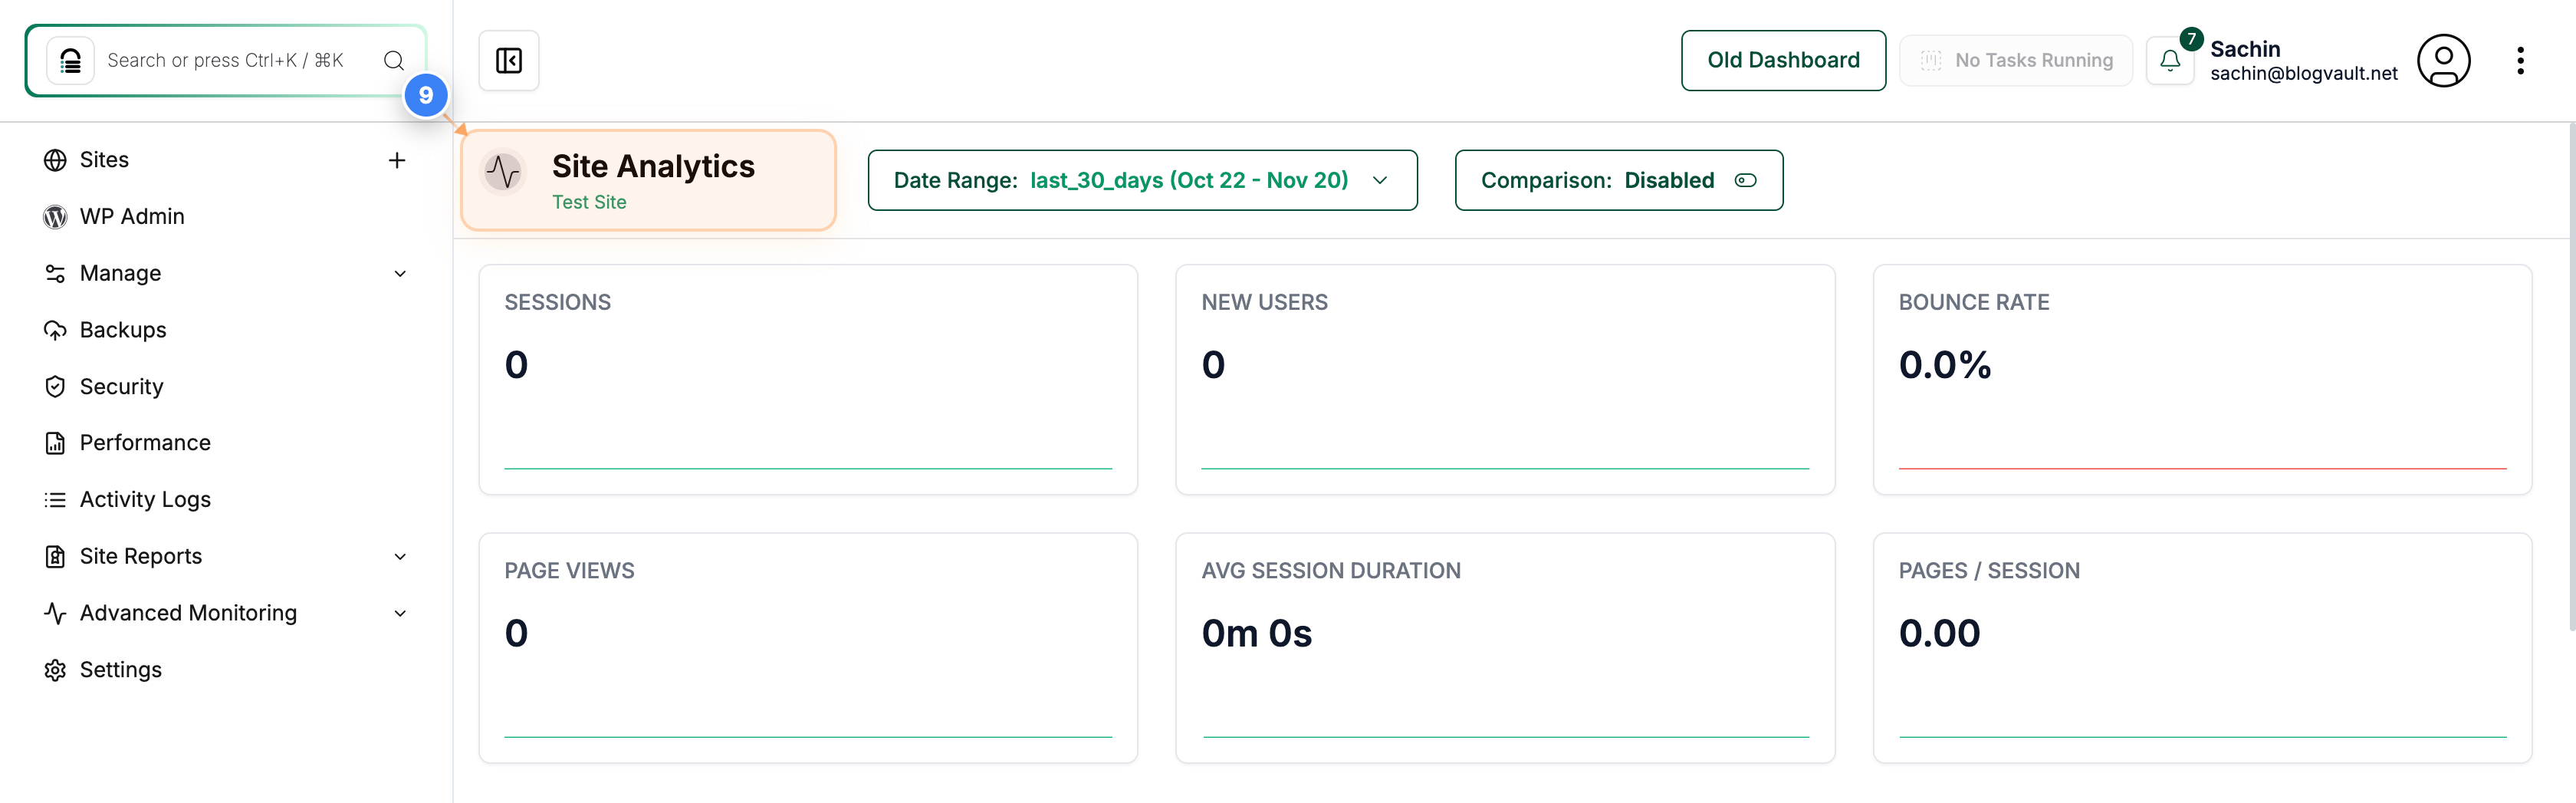
The Site Analytics page will now display Google Analytics data for your Site within the current date range.
Note: You can change the date range from the options at the top of the page.